
Craft the ultimate St. Patrick’s Day celebration with our festive and easy-to-make dessert board! Perfect for parties and gatherings, so you can celebrate in style and add a touch of Irish charm to your festivities.
Leprechaun Approved: St. Patrick’s Day Treat Board
St. Patrick’s Day is a popular holiday that celebrates the patron saint of Ireland, St. Patrick. It is observed on March 17th, a day filled with parades, traditional Irish music, and lots of green!
One way to celebrate this holiday is by creating a St. Patrick’s Day dessert board. This easy and fun dessert board is perfect for parties, gatherings, or just a festive treat at home.
Why We Love This Recipe
Fun and festive: This dessert board is perfect for celebrating St. Patrick’s Day and adding a touch of green to any gathering.
Easy to make: It doesn’t take much effort or skill to assemble this dessert board, making it the perfect activity for families or groups.
Versatile: You can use any combination of items that fit the theme, making this recipe perfect for customization and personalization.
Great for parties: This dessert board is a great way to showcase a variety of treats in one display, making it ideal for parties and gatherings.
St. Patrick’s Day Dessert Board Ingredients
Creating a dessert board is a great way to showcase a variety of treats in one display. It’s also a fun activity that can involve the whole family. You can let your imagination run wild and use any combination of items that fit the green, gold, and rainbow theme.
This dessert board is very forgiving, so feel free to substitute any items or add your own personal touch. If you’re short on time, store-bought bakery items work just as well as homemade treats.
The size of your display board will determine how many items and how much you’ll need to get. Any leftover items can be served next to the dessert board in nice display containers.
For this St. Patrick’s Day dessert board, you will need the following ingredients:

Step by Step Guide
- Start by selecting your display board and all the ingredients you will need.
- Place small items such as sprinkles or chocolate chips in a bowl to keep them organized and contained.
- Begin placing larger items on the board first, leaving enough space for the smaller items as well.

- Next, add medium-sized items to fill in more space on the board. Adjust and rearrange items as needed to create a visually appealing display.

- Finally, add smaller items to fill any remaining gaps on the board. You can always add or remove items, depending on the space you have on your board.

Small items such as M&M’s are good for filling awkward gaps and can help fill voids – save those items for last.
Substitutions and Variations
- Use different types of candies, chocolates, cookies, or other themed treats to fit the green, gold, and rainbow theme.
- Add fresh fruits like kiwi slices or green grapes.
How to Serve
Serve the dessert board at room temperature, allowing guests to pick and choose their favorite treats.
No dessert board would be complete without some drinks to wash it down, so for a St. Patrick’s Day twist, consider serving green-colored beverages such as green beer, minty green shamrock shake, or a refreshing green smoothie.
Add some Irish coffee or Baileys hot chocolate for a cozy and indulgent treat.

Storing Leftover Items
Any leftover items from your dessert board should be stored in an airtight container. If you have any fresh baked goods, it’s best to store them in the fridge for up to 2 days.
Tips & Tricks
- Get creative and have fun with your St. Patrick’s Day dessert board. You can use any combination of items that fit the green, gold, and rainbow theme.
- Add decorative items like shamrock-shaped sprinkles or mini flags with fun sayings for an extra festive touch.
- If you’re short on time, store-bought bakery items work just as well as homemade treats.
- Don’t be afraid to mix and match different textures, sizes, and flavors.
- If you have any leftover items that don’t fit on the board, serve them in nice display containers next to the dessert board.

Additional Ideas
Here are some additional ideas to make your St. Patrick’s Day dessert board even more special:
- Include a mix of homemade treats and store-bought items for convenience and variety.
- Use cookie cutters to create fun shapes with your desserts, such as shamrocks or rainbows.
- Add a touch of Irish whiskey by infusing it into chocolate truffles or serving it on the side to pair with your dessert board.
- Don’t limit yourself to just sweets – you can also include savory snacks like Irish cheddar cheese and crackers or corned beef bites.
- Personalize your dessert board with a fun banner or sign that says “Happy St. Patrick’s Day!”.
- Have a pot of gold at the end of your dessert board by filling a small cauldron with chocolate coins.
- Use edible gold dust or sprinkles to add a touch of elegance and shine to your desserts.


This St. Patrick’s Day dessert board is a fun and delicious way to celebrate this holiday. With a colorful and festive display of desserts, it’s sure to be a hit. So gather your loved ones, add traditional Irish music, and enjoy a sweet and memorable St. Patrick’s Day together!
More St. Patrick’s Day Treats
I hope you enjoy your St. Patrick’s Day Dessert Board. If so, please leave a star ★★★★★ rating and a comment below!

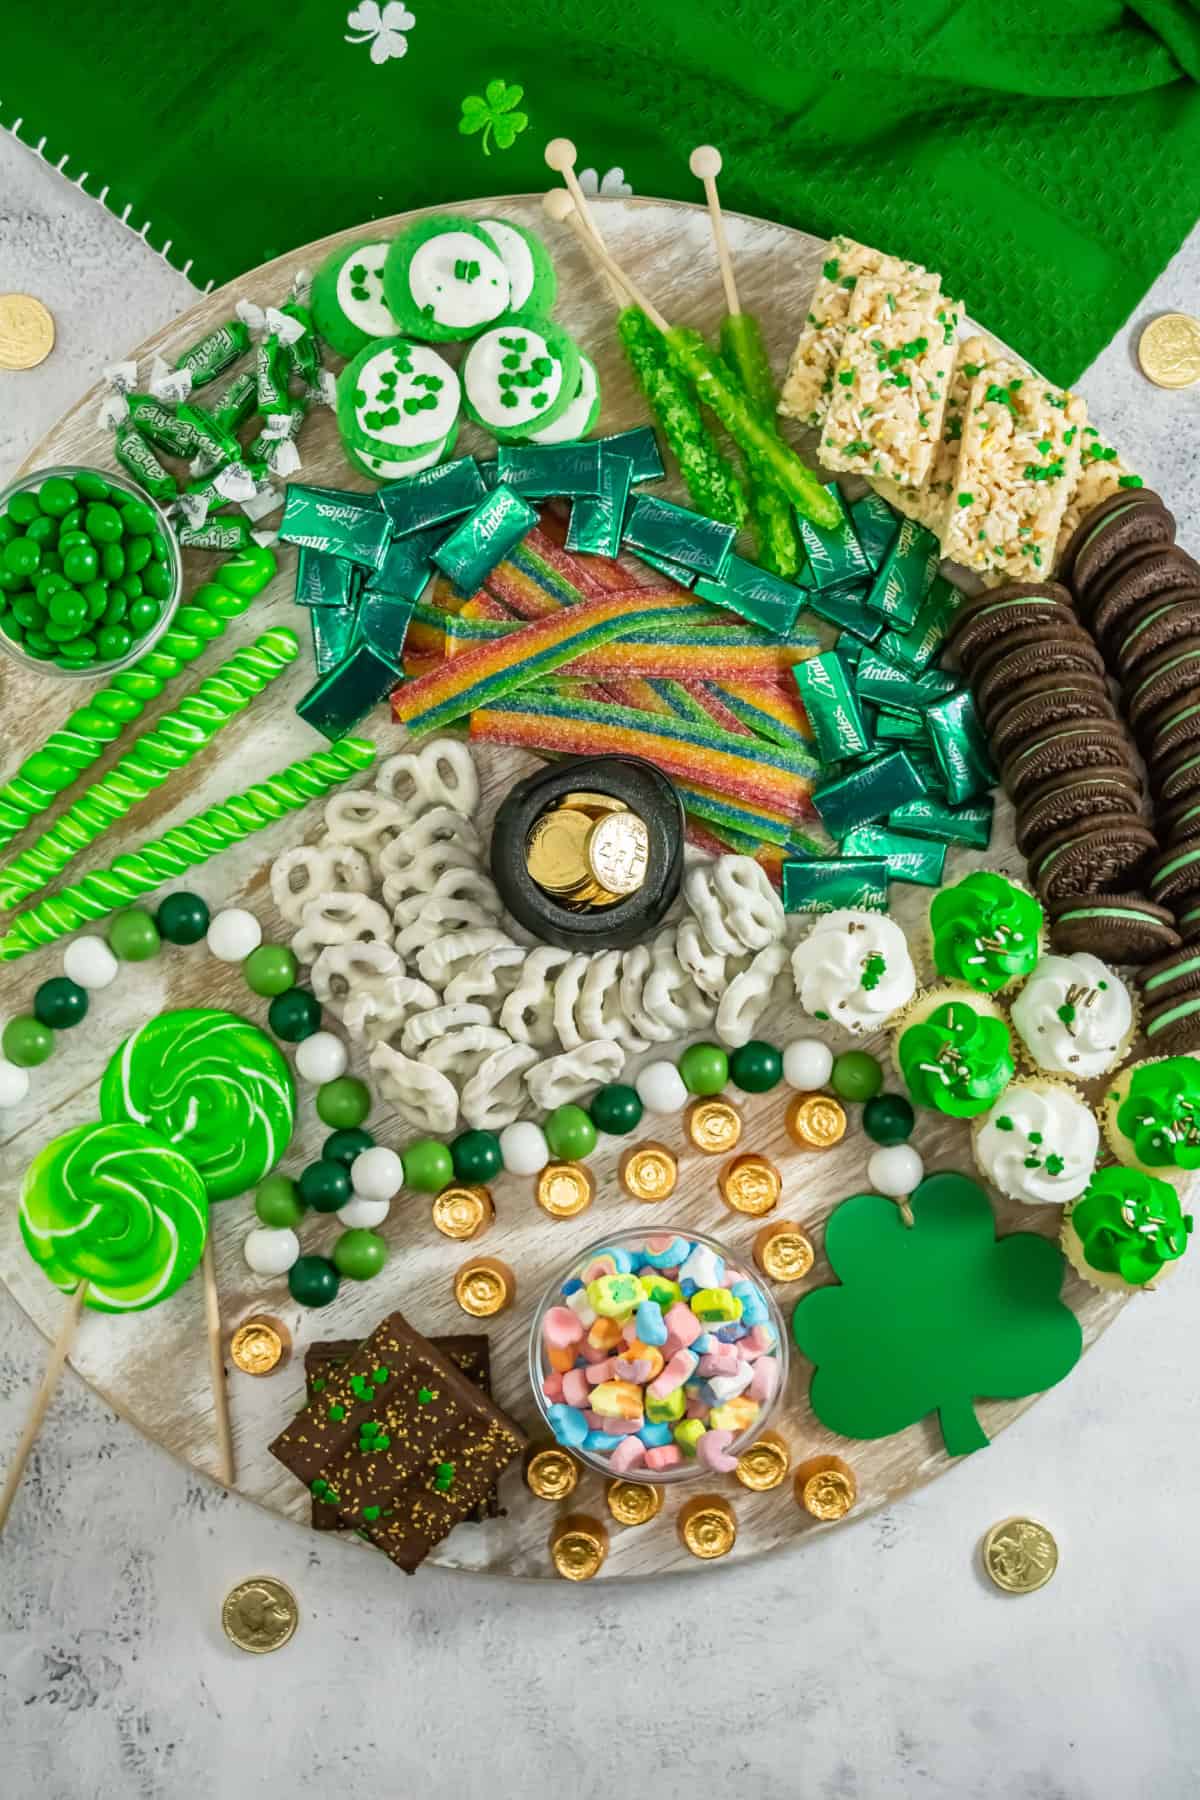
St. Patrick’s Day Dessert Board
Ingredients
- Ande’s Mints still in wrapper
- White chocolate covered pretzels
- Green tootsie rolls green apple
- Mint Oreos
- Green rock candy
- Green M&M’s
- Rolo’s candy still in wrapper
- Lucky Charm marshmallows
- Gold chocolate coins
- Airhead rainbow strips
- Green lollipops
- St. Patrick’s decorated brownies
- St. Patrick’s decorated mini cupcakes
- St. Patrick’s decorated rice krispy treats
- St. Patrick’s decorated sugar cookies
Instructions
- To assemble: Select your offerings and display board.
- We suggest that super small items such as sprinkles, chocolate chips, etc. (if applicable) be displayed in a bowl to keep items organized and contained.
- Beginning with some of your larger items, begin placing the items around the board.
- Follow up with some medium size items to fill more room. Adjust items as you go to create space and fill the board.
- Finally, place the smaller items in any gaps and continue to adjust to accommodate the items. Add more items or take some away, if needed.
- Tips – small items such as M&M’s are good to fill in awkward gaps and can help fill voids – save those types of items for last.
Last Step: Please leave a star ★★★★★ rating and a comment below to let me know what you thought!
Nutrition information is automatically calculated, is intended to serve as an estimate only, and is provided for informational purposes. The accuracy of nutritional information is not guaranteed.