


Make these cute cupcakes for an after-school treat or delicious dessert after your Easter dinner. They would also make a nice treat for a themed classroom event or your next spring party.
Easter Chick Mini Cupcakes
You can’t go wrong with themed cupcakes, can you? Not only do they look extra special when you bring them out for friends and family or at gatherings and parties, but they can also be a great way to get the kids involved in the kitchen.
Many children love to be involved with cooking and baking, and these Mini Spring Chick Cupcakes are super easy to make and a lot of fun to create.
The white boxed cake mix really does take all of the hassles out of baking. You just need a few simple ingredients to combine with the cake mix, and you are ready to make delicious cupcakes. This is all in the decoration, and while it may seem like making spring chicks could be intricate and a little complicated, I have simplified it down, and they look super cute.
This is the perfect activity to do in the spring, over the Easter break, and after school with your little ones when you want to pass some time.
And if you enjoy making treats for Easter, then you will also enjoy these adorable Easter egg brownies and these blondies with delicious Creme Eggs.
Here is everything you need to know to make your mini spring chick cupcakes.
Ingredients
First of all, it is a good idea to ensure that you can get all of the ingredients together. Focusing on this first means that the cooking process will be simple. You will need:
For the Cupcakes:
- White Boxed Cake Mix – Plus ingredients listed on the back of the box
For the Decoration:
- Yellow Icing
- Candy Eyes
- Reese’s Pieces
Kitchen Supplies:
You can find exact measurements, ingredients, and instructions in the printable recipe card at the end of this post.
How to Make These Easter Chick Mini Cupcakes
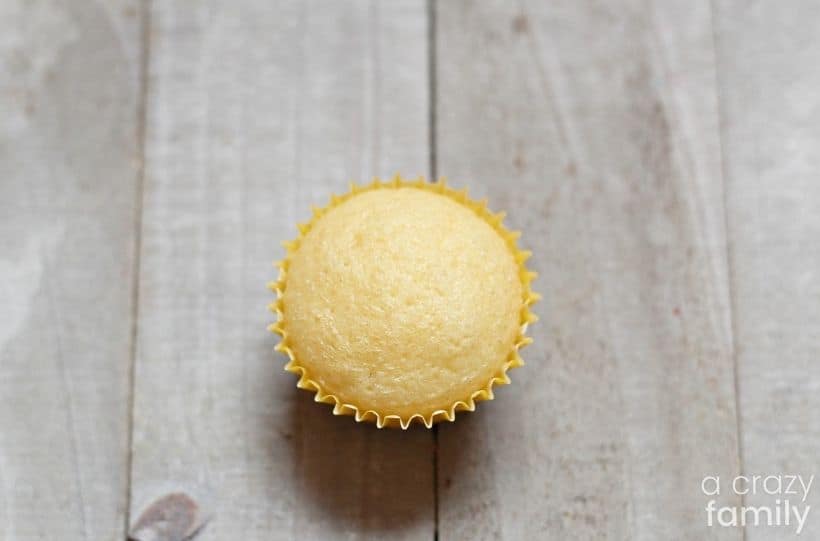
1. The first thing you need to be preparing is the cupcakes. You can start by mixing your cake mix, water, oil, and eggs until well combined. Easy to make, and your cupcakes are ready to bake.
2. Line your baking pan with cupcake liners and fill each halfway. Bake according to box instructions and then let cool completely. You can use a wire rack for this.
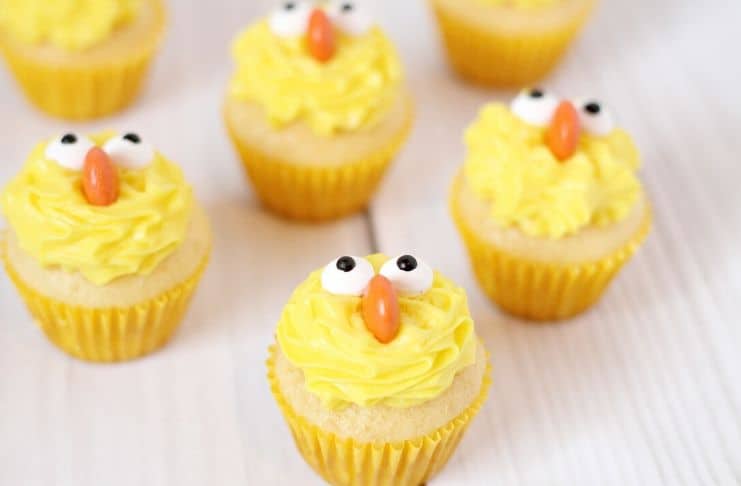
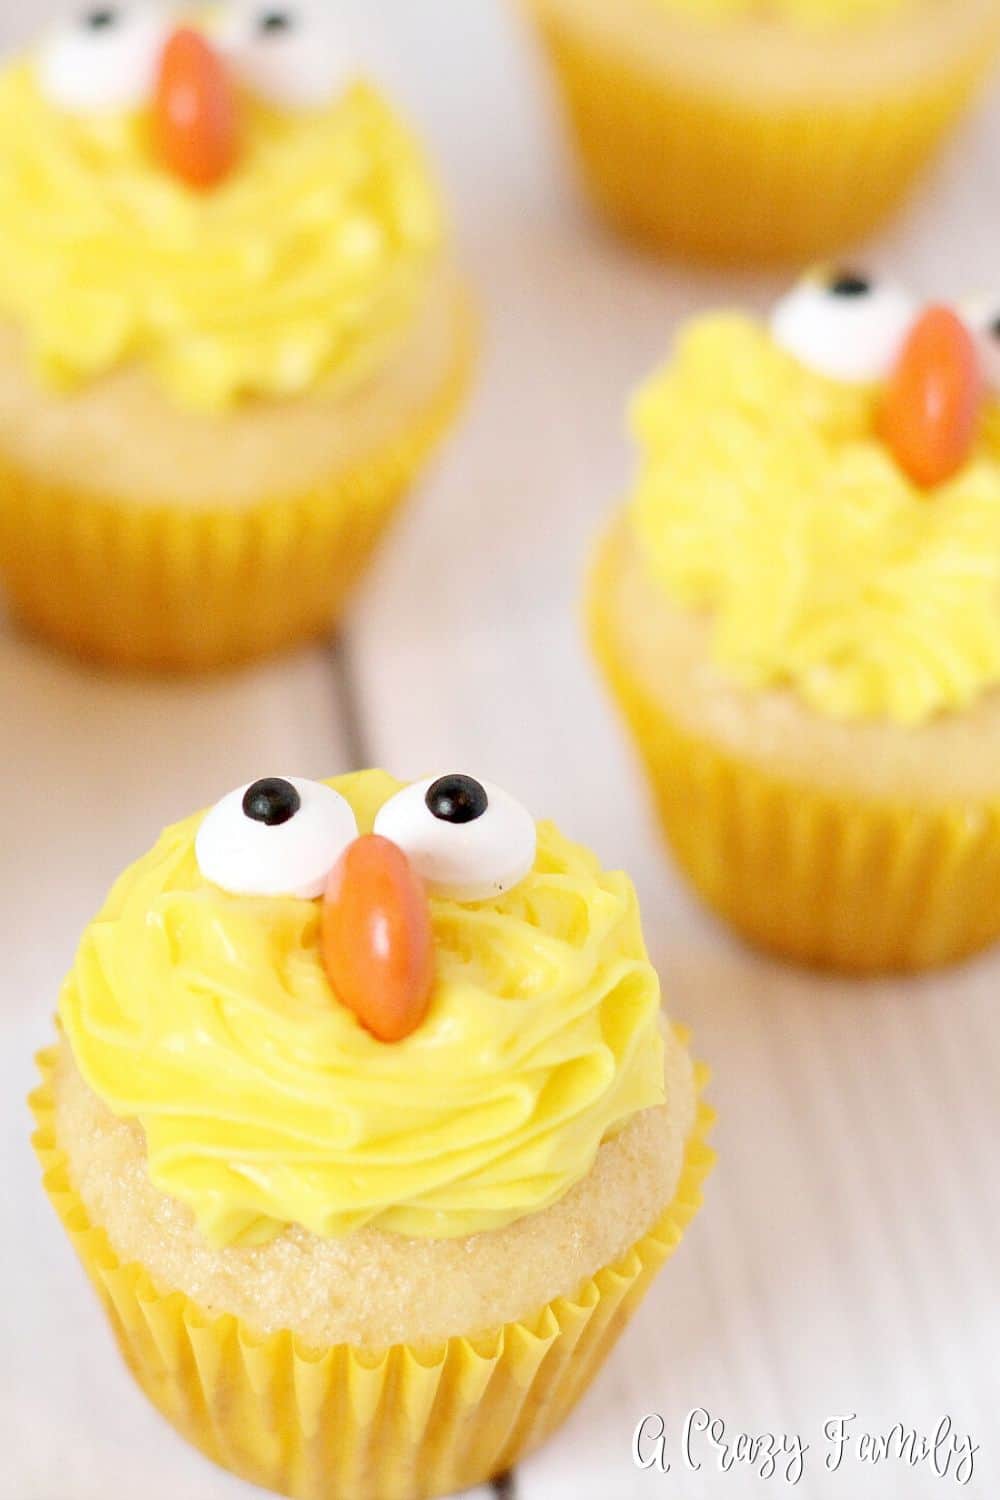
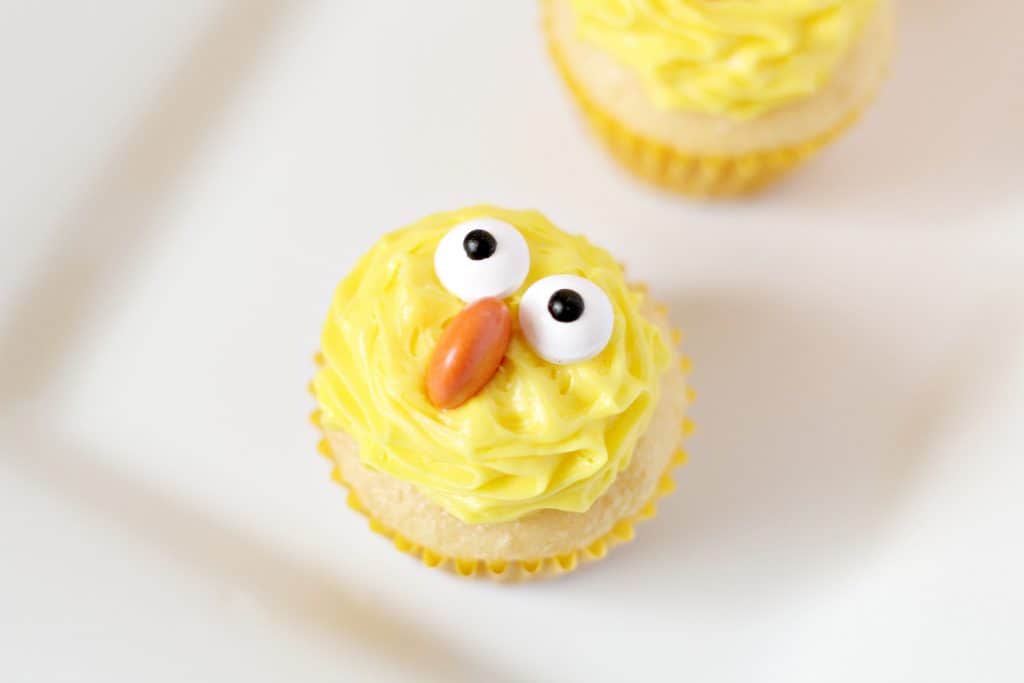
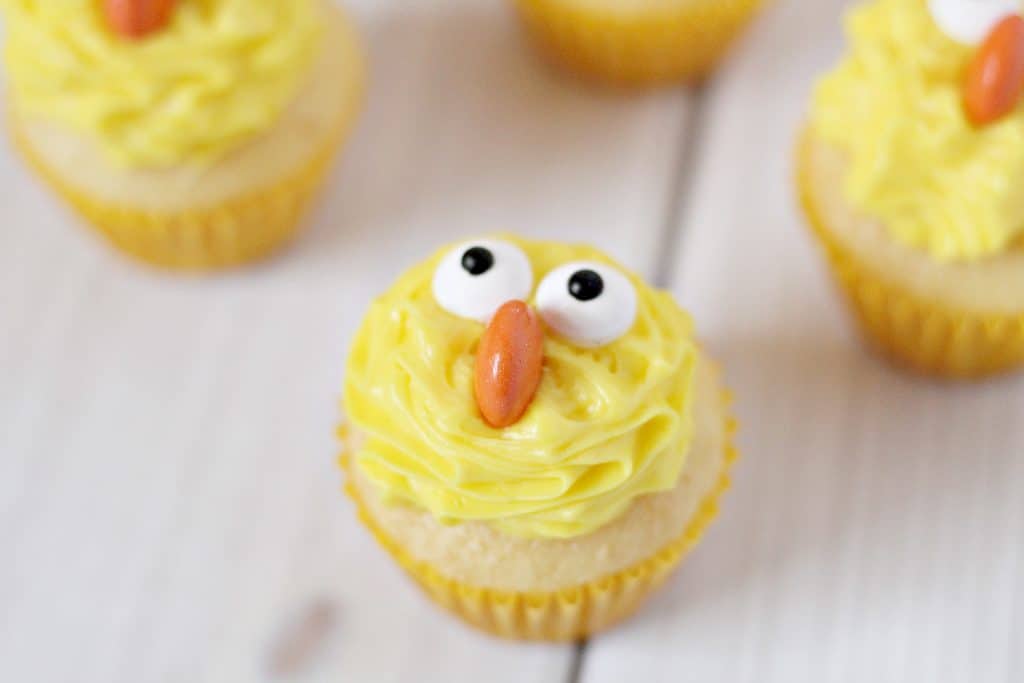
3. Fill your piping bag with yellow icing and install your tip on the end of the bag. This will create your chick’s face.
4. Start in the middle of your cupcake, and don’t move as you push about 1 teaspoon of icing out of the piping tip.

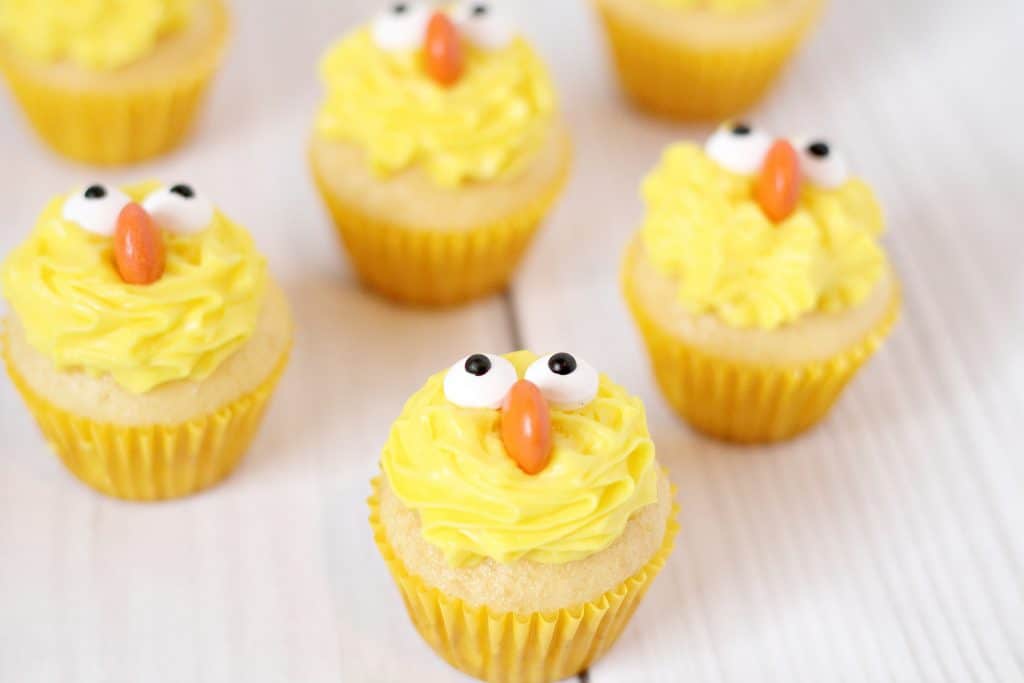
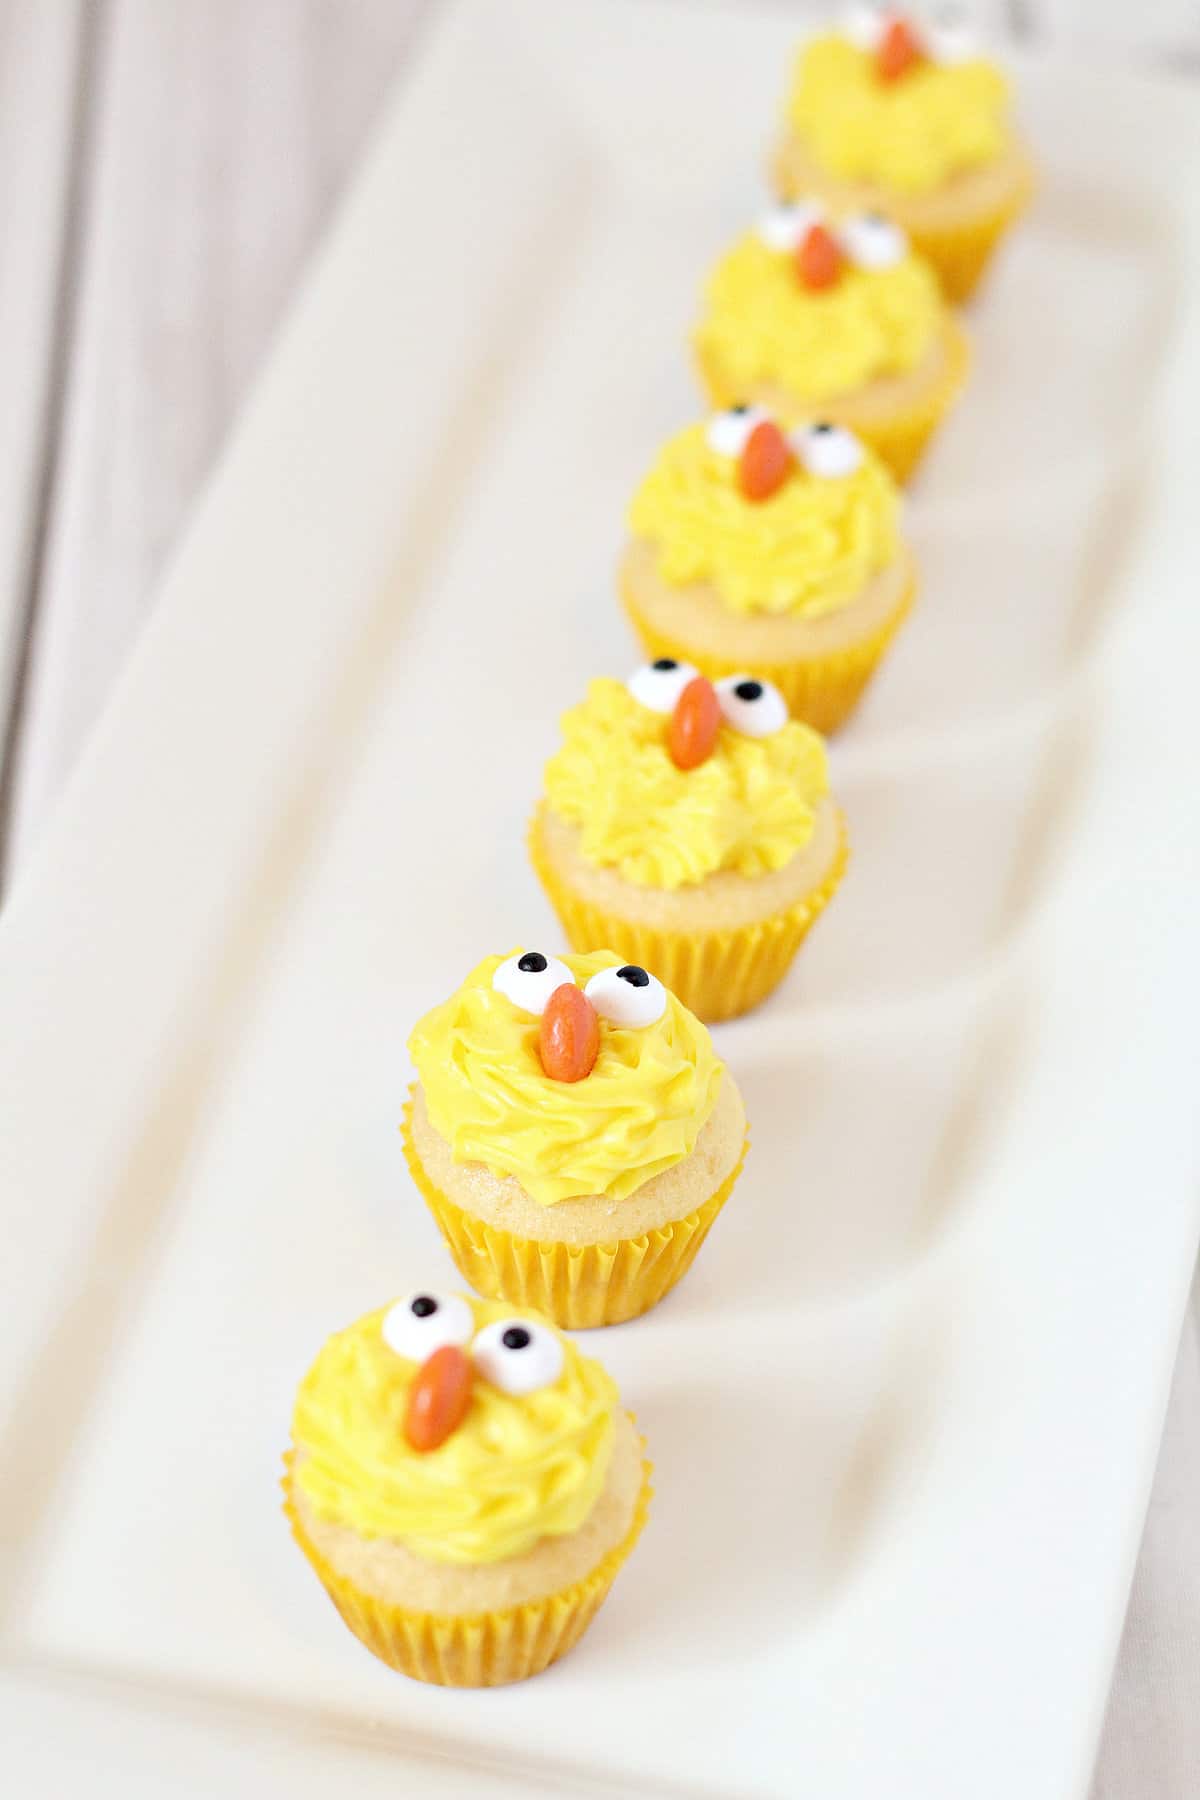
5. Once each cupcake is iced, add two candy eyes and an orange Reese’s Pieces to each cupcake for a beak. If you need a visual, then check out the process pictures so you know how it should look.

6. Serve up your cute mini spring chicken cupcakes.
Tips & Tricks
- You must let the cupcakes cool completely before you add any icing. If you don’t, the icing will simply melt and create a big mess.
- If you can’t get hold of candy eyes or Reese’s Pieces, then use any other sweets you can. You could also use icing if you are confident with small details.
- Use two cake boxes to double up the quantities. Especially good if you are catering for a large party.
Variations
- You don’t need to use a white cake mix. Instead, chocolate will be just as tasty. The yellow icing will stand out, and you will still be able to tell that you are making spring chicks.
- You can use icing to make other Easter or spring-themed shapes and designs. Maybe create some colorful eggs on top of the cupcakes or perhaps Spring flowers.
- Make your own frosting. You could easily make your own frosting. Cream cheese frosting will be especially tasty, and a few drops of yellow food coloring will help you to get the overall look.
- Make a nest using brown icing or some chocolate around the edge of your spring chick.
Can I bake my own cupcakes for this recipe?
Sure you can! Just use your preferred cupcake method and bake away.
How do I store the Mini Spring Chick Cupcakes?
When it comes to cupcakes, these are best stored at room temperature. Transfer them to an airtight container that is big enough for them to be stored in one layer, and then leave them on the side or on the counter. They will keep at their best for up to 7 days before starting to dry out a little.
Can I freeze these cupcakes?
It would be best to freeze them before you add any icing or decoration to them. Freeze the white vanilla cupcakes in an airtight container or freezer bag and allow them to thaw before adding the icing or frosting. This is a great way to prepare ahead of time or to have an activity ready for the kids when you need something for them to do and enjoy.
Can you make this dairy-free and gluten-free?
This is mostly dairy-free anyway, but you will need to ensure that the icing or frosting you are using doesn’t contain dairy products. Making your own will ensure that these spring cupcakes are dairy-free.
To make this gluten-free, you will need to bake your cupcakes from scratch using your preferred gluten-free flour.
Perfect to make with the kids, this easy, semi-homemade spring dessert would be a cute end to any Easter or Spring-themed celebration. And the best part about this recipe is that it’s surprisingly EASY with a box cake shortcut…and everyone will love how delicious they taste!
I hope you enjoy making and eating your Mini Spring Chick Cupcakes. If so, please leave a star ★★★★★ rating and a comment below! Follow along on Pinterest, Facebook, or Twitter for more delicious recipes!
More of our favorite Easter recipes and crafts:

Mini Spring Chick Cupcakes
Ingredients
- 1 Box of White Cake Mix
- 1 cup of Water
- 1/2 cup of Vegetable Oil
- 3 Eggs
- Mini Cupcake Liners
- Mini Cupcake Baking Pan
- Yellow Icing
- Icing Piping Kit and 1M Tip
- Candy Eyes
- 1 Bag of Reese’s Pieces
Instructions
- Start by mixing your cake mix, water, oil, and eggs until well combined.
- Line your baking pan with liners and fill each halfway.
- Bake according to box instructions.
- Let cool completely.
- Fill your piping bag with yellow icing and install your tip on the end of the bag.
- Start in the middle of your cupcake and don’t move as you push about 1 teaspoon of icing out of the piping tip.
- Once each cupcake is iced, add two candy eyes.
- Finally, add an orange Reese’s Pieces to each cupcake for a beak, as shown.
- Serve and enjoy!
Last Step: Please leave a star ★★★★★ rating and a comment below to let me know what you thought!
Nutrition
Nutrition information is automatically calculated, is intended to serve as an estimate only, and is provided for informational purposes. The accuracy of nutritional information is not guaranteed.