Christmas Craft Stick Santa
This post may contain affiliate links. Please read our disclosure policy.
This holiday season, add a touch of festive charm to your decor with this adorable DIY Santa craft. Using simple materials and easy steps, you can create your own miniature Santa figure to display in your home or give as a gift.

DIY Santa Craft: An Engaging Holiday Activity for Kids
This DIY Santa craft is not only a fun and creative project for adults, but it can also be a great activity to do with kids. They will love painting and decorating their own Santa figure, and it’s a great opportunity to bond over the holiday season.
This DIY Santa craft is an easy and enjoyable project to add some holiday cheer to your home. So gather your materials, put on some festive music, and have fun creating your very own jolly Saint Nick.
Supplies Needed for Craft Stick Santa

- Craft paint in pink, white, light blue, black, and red
- Paint brushes (angled and fine tip)
- Craft sticks
- White faux fur
- Miniature Santa hats and wreaths (available at hobby lobby)
- Gold Sharpie
- White paint pen
- Scissors
- Hot glue/hot glue gun
How to Make This Santa Craft
Begin by setting two craft sticks side by side for the legs of Santa.
Carefully hot glue 3 craft sticks onto the top of the 2 side-by-side Craft sticks, leaving the bottom of the legs showing as pictured. This will be the body and head of Santa.
Carefully cut 1/3 of 2 Craft sticks off using scissors.
Turn your glued Craft sticks over and hot glue the 2 2/3 pieces into the sides with the raw end facing up. These will be the arms of Santa.
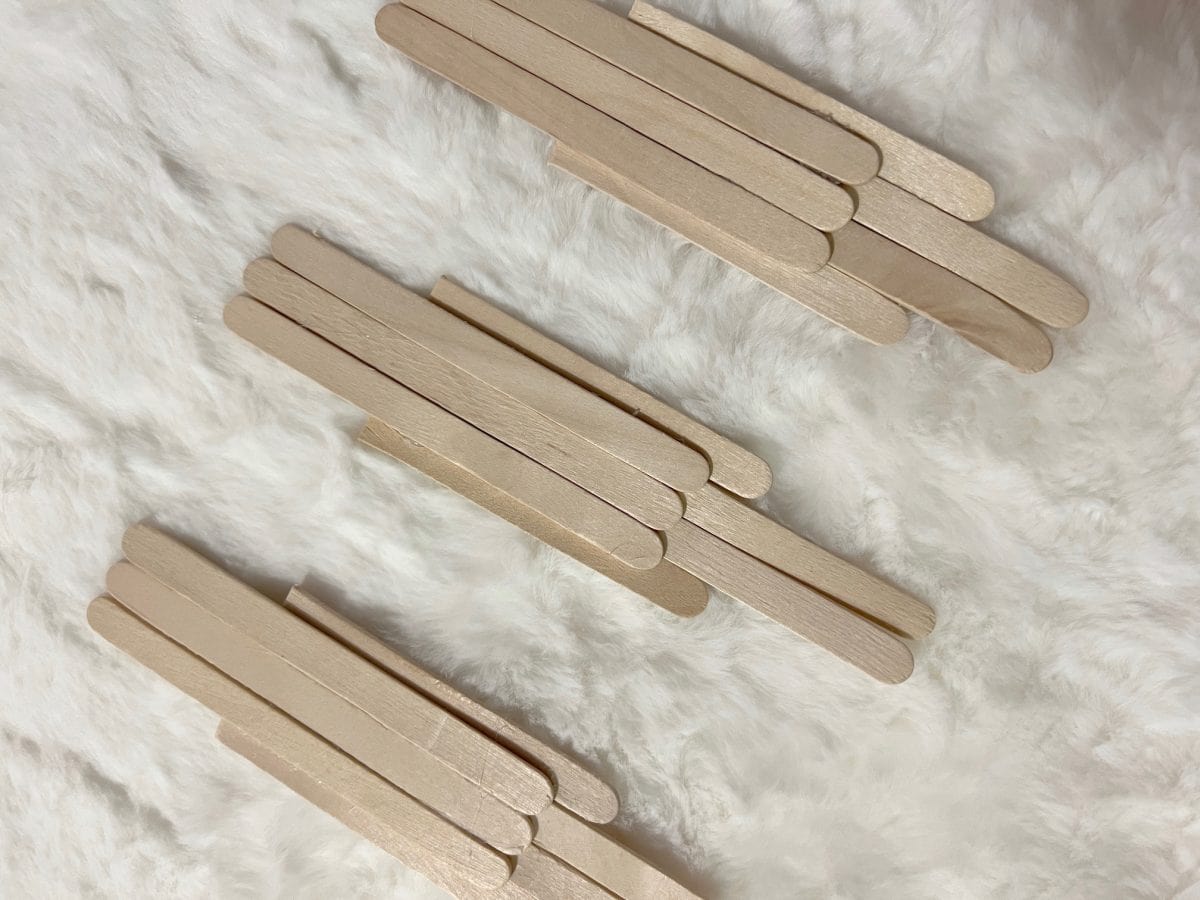
Use the white paint pen to paint the top center craft stick white, leaving a block at the top for Santa’s head.

Paint the rest of Santa red using an angled brush, again leaving a block at the top for his head.

Use a fine-tip paintbrush and black paint to add small details for the eyes, such as a half circle with lashes, or use white, blue, and black to paint the eyes.
Use the pink paint to create three small circles for Santa’s nose and cheeks. Then use the white paint pen to draw on a mustache.

Use the gold Sharpie to add metallic details, such as boots and mittens.
Take a tiny black paintbrush and paint buttons down the white center of Santa’s coat and a belt across his waist.

Cut a thin strip of white faux fur to glue above Santa’s eyes for eyebrows and a small triangle piece to glue under his mustache for a beard.
Slide a miniature hat onto the top of Santa’s head and secure it with hot glue.
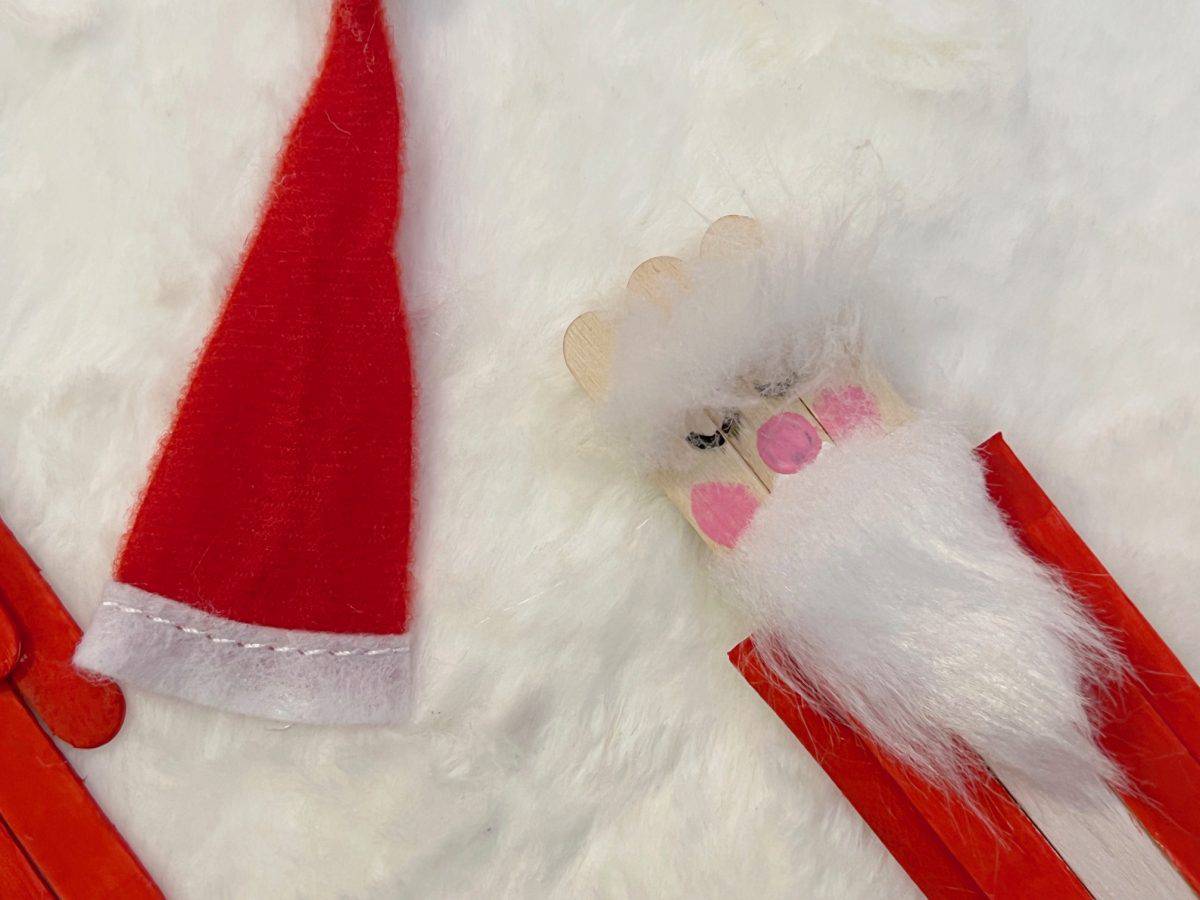
For a finishing touch, hot glue a miniature wreath onto the front of Santa’s coat by his belt.
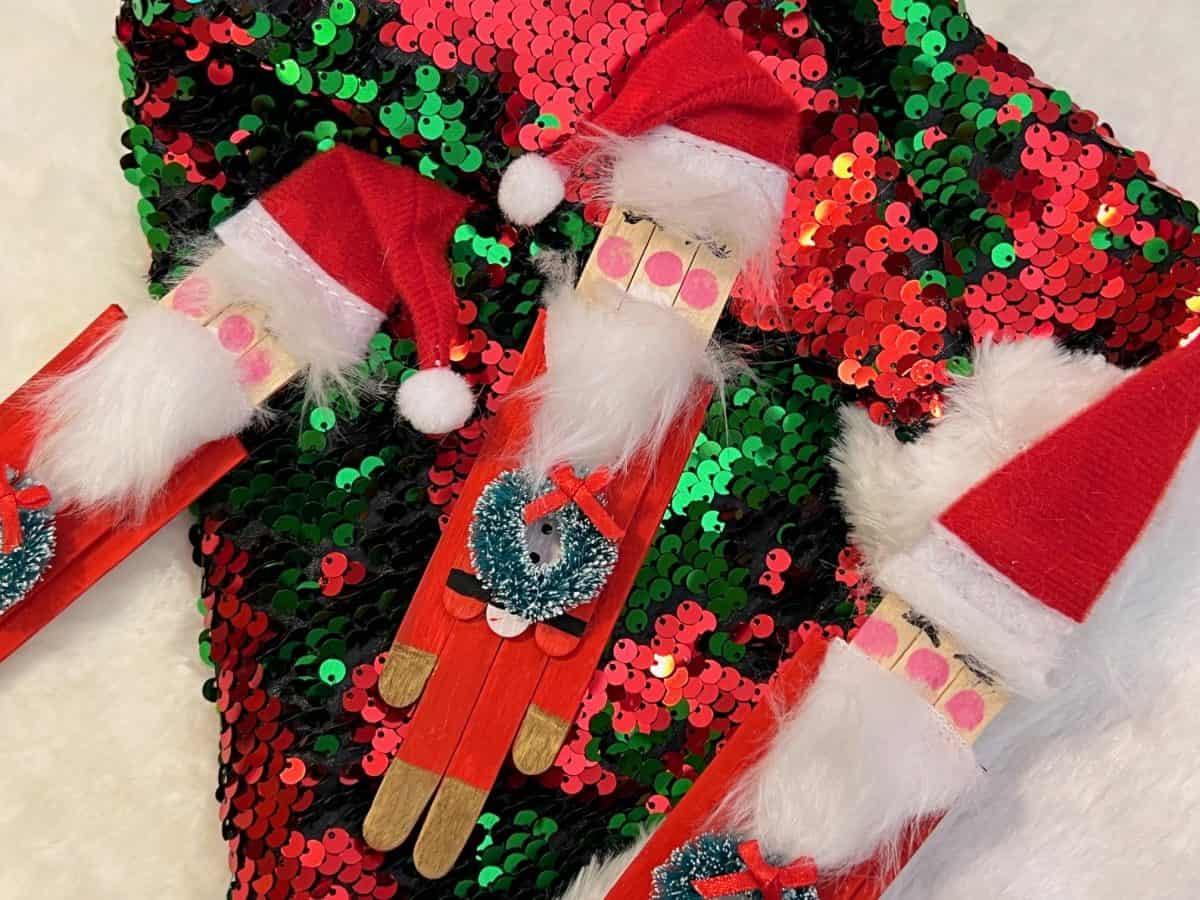
Aren’t they just the cutest?! You could make these for friends, family, or even teachers as a sweet holiday gift idea! You could also attach a looped string to the back to turn Santa into an ornament or glue a magnet on for easy display on your fridge.
Tips & Tricks
- If using this craft as an activity with kids, Make sure to use caution and proper supervision when using hot glue guns or scissors.
- Personalize your Santa using different colors or adding details like glitter or pom-poms.
Frequently Asked Questions

Can I use different materials if I don’t have access to all the listed items?
Yes, you can substitute some of the materials with similar ones, such as using a small piece of fabric for the hat instead of a miniature hat.
What if I don’t have hot glue?
If you don’t have access to hot glue, you can use strong craft glue as an alternative.

Can I make this craft with younger children?
While this project may require some adult supervision, it can be done with younger children as long as safety precautions are taken when using hot glue and scissors.
Craft Stick Santa
Supplies
- Craft paint Pink, white, light blue, black, red
- Paint brushes Angled and a fine tip
- Craft sticks
- White faux fur
- Miniature Santa hats and wreaths can get at hobby lobby
- Gold Sharpie
- White paint pen
- Scissors
- Hot glue gun
Instructions
- Set 2 craft sticks side by side for the legs of Santa.
- Carefully hot glue 3 craft sticks onto the top of the 2 side-by-side Craft sticks, leaving the bottom of the legs showing like pictured. This will be the body and head of Santa.
- Carefully cut 1/3 of 2 Craft sticks off using scissors.
- Turn your glued Craft sticks over and hot glue the 2 2/3 pieces into the sides with the raw end facing up. These will be the arms of Santa.
- Using the white paint pen, paint the top center Craft stick white, leaving a block up top plain for Santa’s head.
- Paint the rest of Santa red using an angled brush, again leaving a block up top for Santa’s head.
- Paint the small details of the eyes with a paintbrush. A half circle with lashes or use white, blue, and black to paint eyes.
- Using pink, paint 3 small circles for a nose and cheeks and use the white paint pen to draw on a mustache.
- Use the metallic Sharpies to draw on the details, like boots and mittens.
- Use a tiny black paintbrush to paint buttons down the white center of Santa’s coat and a belt across his waist.
- Cut 1 very thin piece of white faux fur to glue above Santa’s eyes and a small triangle piece to glue under his mustache for a beard.
- Slide a hat onto the top of Santa’s head and secure it with hot glue.
- Hot glue the back of a miniature wreath onto the front of Santa by his belt to complete.
Notes
These craft stick Santas are SO easy to make, and they also make a stunning addition to your tree! It’s also a great activity for kids and a perfect gift idea. Get creative, personalize it to your liking, and have fun with this adorable Santa craft.
More Fun Christmas Crafts
Pin This Santa Craft for Later!


