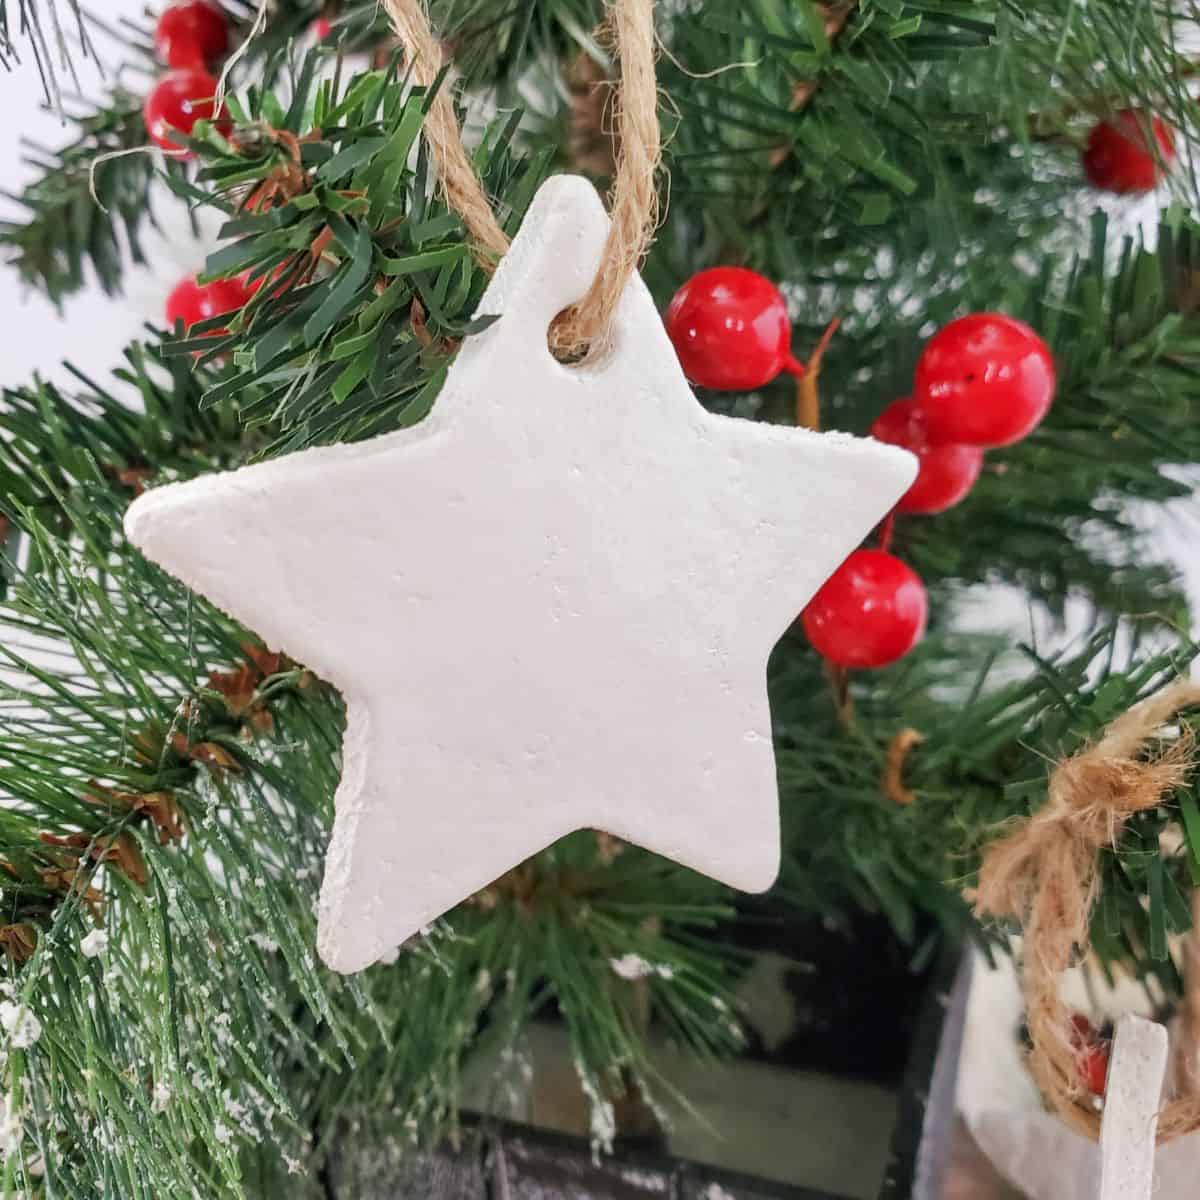


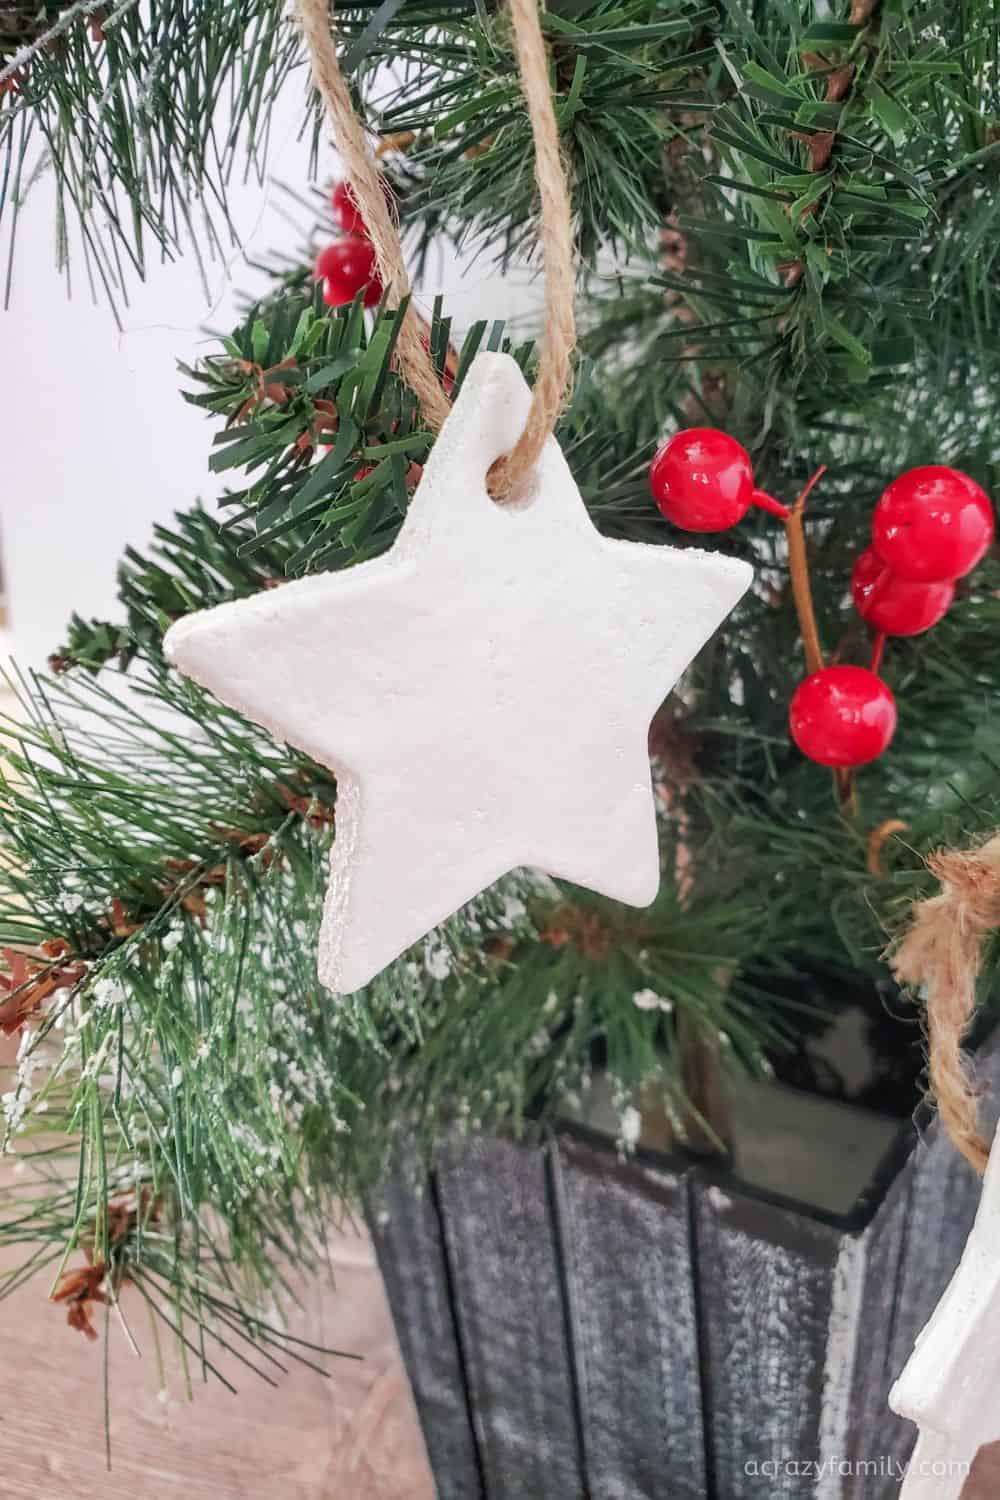
Your family will have such fun making these salt dough star ornaments. This is a perfect family craft for the holidays. Make this ornament craft project for your tree or to gift for the holidays.

What is it about crafts and children? Children love making things, and as an activity, it can be a great way to get them away from technology or other things that can be a distraction.
Your family will have such fun making these salt dough ornaments, and I can’t wait to share with you exactly how you can do it.
This is a perfect family craft for the holidays. You can make this ornament craft project for your tree or as a DIY gift for Christmas.
This simple holiday craft is a perfect project for the family to do together, and children, young and old, will love to get involved. The ornaments can be used on your tree and/or given as gifts.
You could even tie them to presents as an unusual and unique gift tag. The options are endless. So if you want to find out how to make salt dough star ornaments, then here is everything you need to know to make them yourself.
Supplies

- All-purpose flour
- Salt – regular table salt works best
- Warm water
- Rolling pin
- Parchment paper – this is optional (not shown). See the notes as to why parchment paper can be useful.
- 2.5-inch star cookie cutter
- Straw (not shown) – to make the hole at the top.
- White spray paint
- Twine
- Scissors
Variations
- You could follow this same process for other Christmas-inspired shapes. You could do Christmas trees, baubles, bells, or any shape you like.
- This doesn’t need to be a craft you do at Christmas time. A hanging ornament can work at any time of the year. You could make different shapes, add hand prints for younger children, or gifts when you are looking for something more personalized.
- Decorate the salt dough star ornaments with different things. You could stick materials onto them or even add paint that you brush on rather than using spray paint and glitter.
How to make the Salt Dough Star Ornaments
Now that you have everything that you need it is now time to start creating. There will be times when you will need to help younger children with certain parts of the process.
Preheat the oven to 250 degrees.
Mix the flour and salt in a medium bowl.
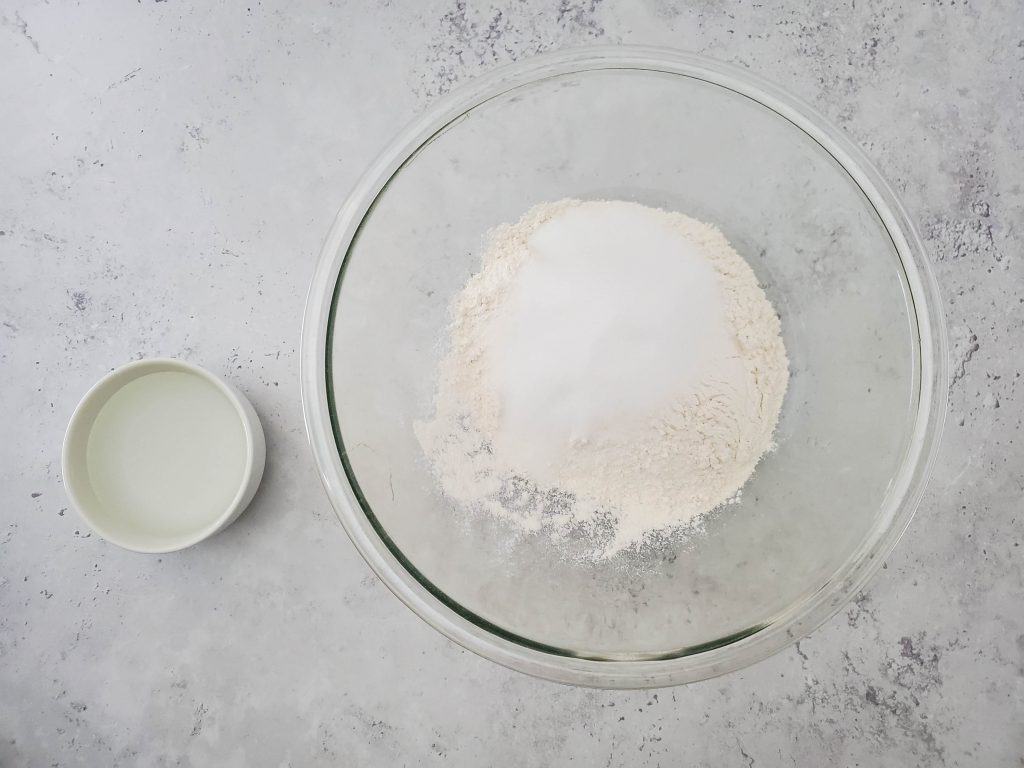
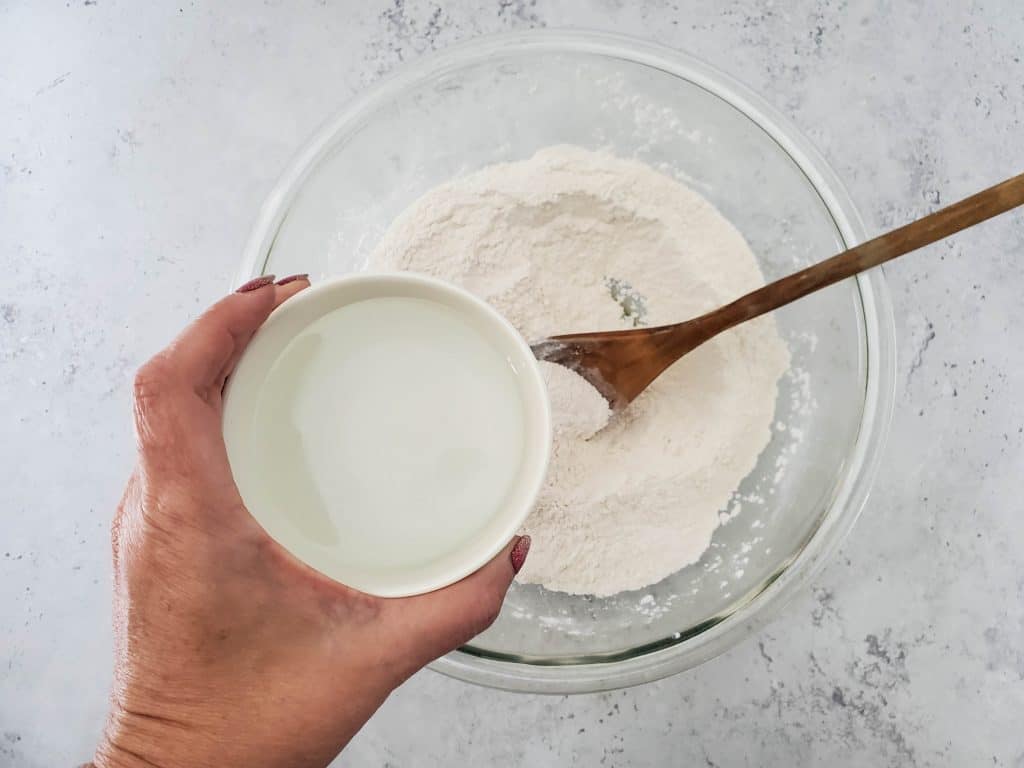
Slowly stir in the water, then knead with your hands once it gets too tough to stir.
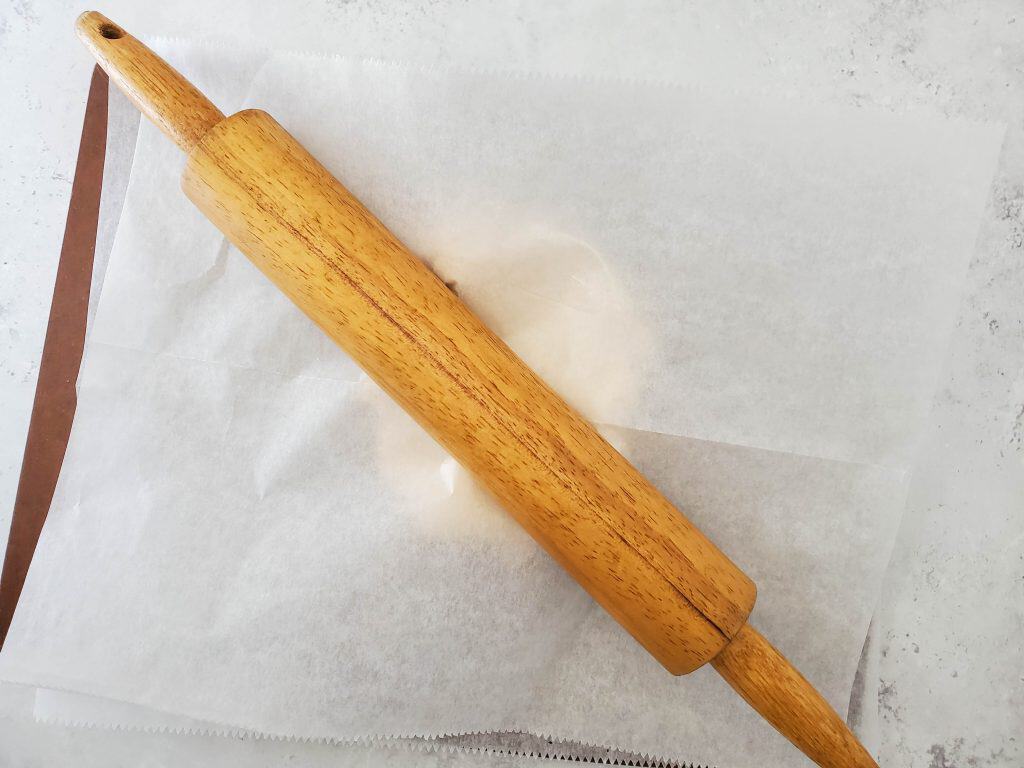
Lay out a sheet of parchment paper, then put half the dough on it. Place another sheet of parchment paper on top. Roll the dough out until it is an even layer, about ⅛ of an inch thick.
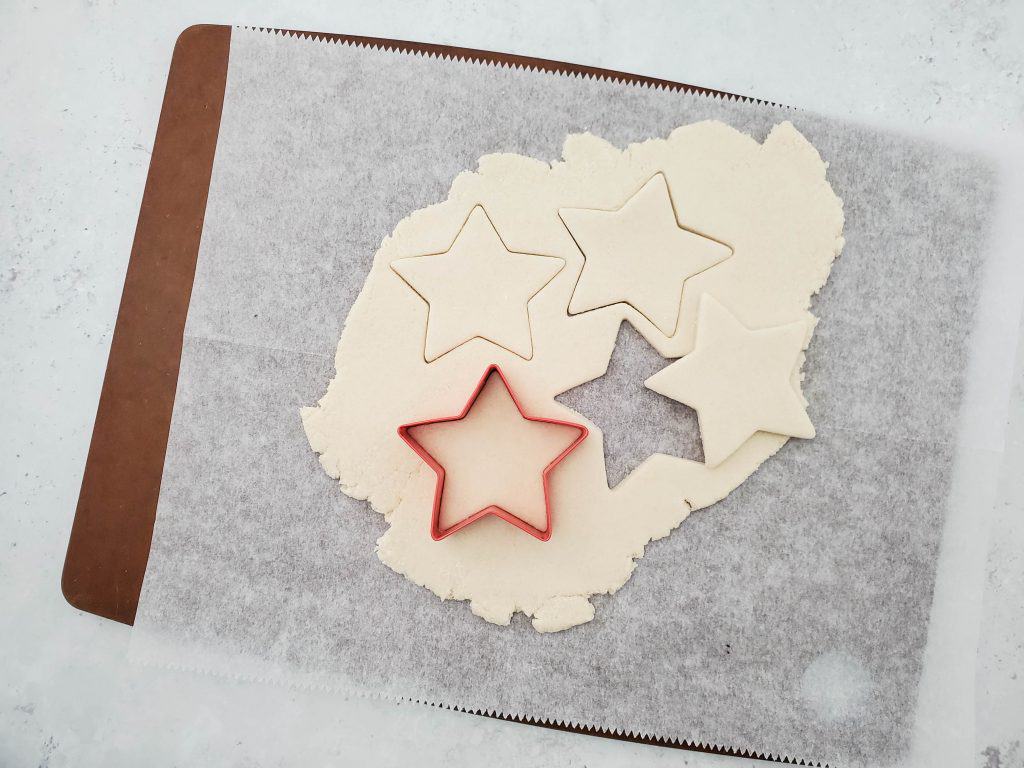
Cut out the star shapes, then remove the excess dough.
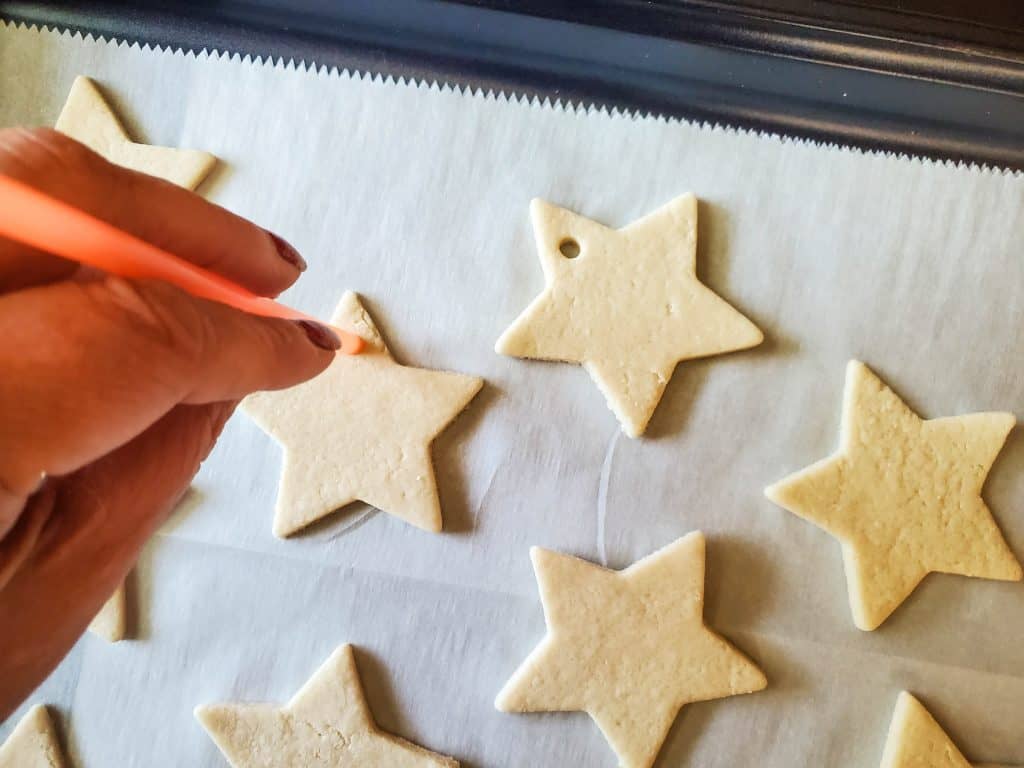
Poke a straw through the dough, toward one of the star points, to later be used to hang the ornament.
Place the parchment sheet on a large baking sheet, and bake in the oven for about 90 minutes.
Check on the baking dough after 60 minutes though, as cooking times vary, especially depending on the thickness of your dough. You want the dough to be firm, and hard; then it is done.
Once the dough is cooked through, remove it from the oven and allow it to cool completely.
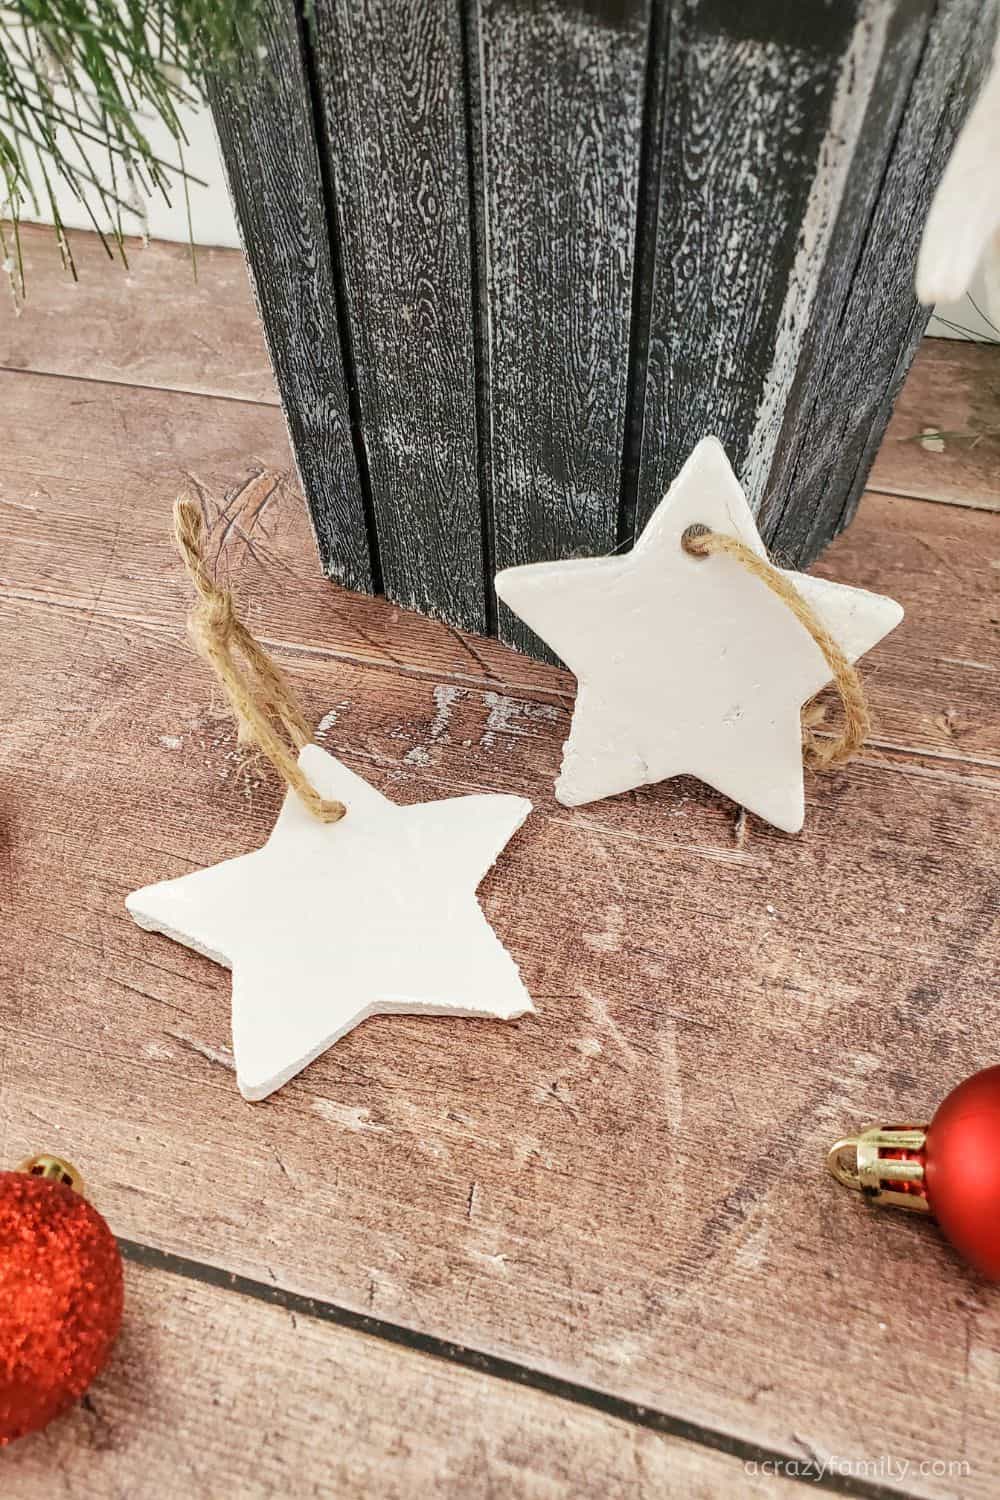
Put the star ornaments on cardboard and take them outside to spray with paint. Allow the paint to dry, then flip over and spray the other side. Add an additional coat of paint to each side, if needed.
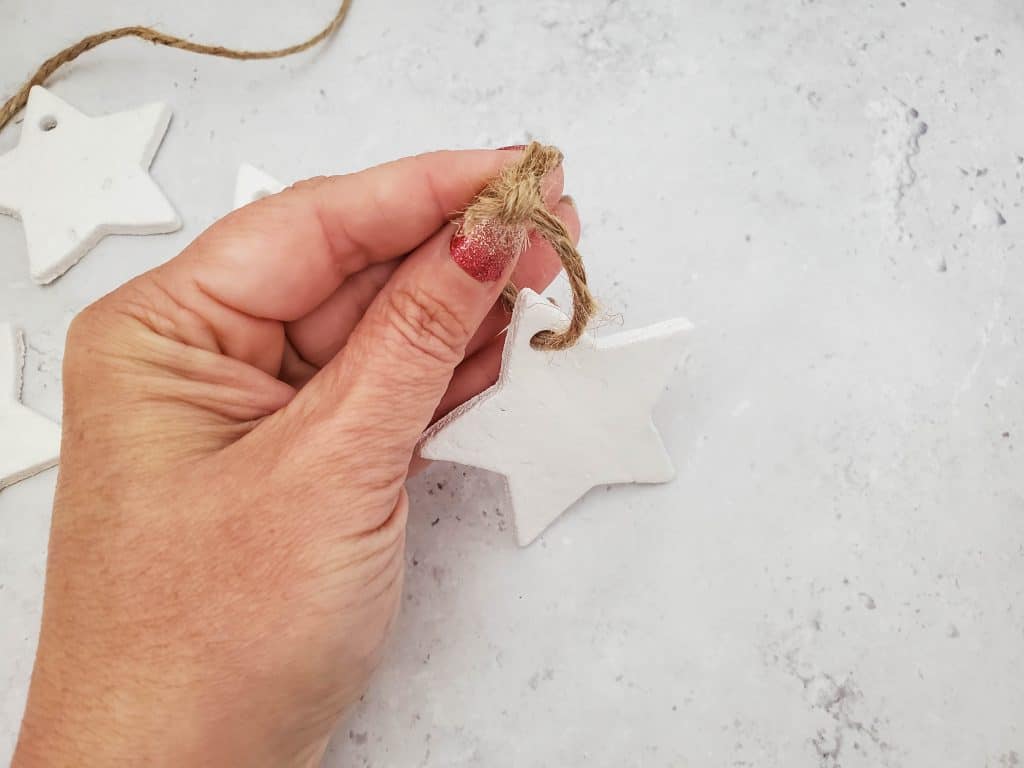
Once ornaments are completely dry, cut 8-inch lengths of twine, push one end through the hole on each ornament, and tie at the top.
Extra notes and tips that could help
When it comes to crafts, we all know that they often can be a little stressful for parents. So here are a few extra notes and tips to ensure that this crafting session goes smoothly.
- Baking times may vary if you roll out the dough thicker or thinner than I did, so check on the ornaments before the time is up, and adjust accordingly.
- Rolling the dough out between two pieces of parchment paper is easier. This stops the dough from getting stuck on your rolling pin.
- If you are getting your children involved with making the salt dough star ornaments, then make sure they are supervised. Especially if they are around when you are checking the oven and during the baking process of the salt dough.
Frequently Asked Questions
You can make the dough ahead of time before you decorate them. You could essentially split this craft into two sessions.
So one session, you spend time making the dough and shapes and baking the salt dough star ornaments. The second craft can be done later when you spend time decorating them.
There are craft kits you can buy where the dough, or in some cases molding clay, is already made for you. Buying something will save time, but I feel that making the salt dough can be a fun part of the craft for kids to get involved in.
More Fun Christmas Ornaments
- Wooden Clothespin Reindeer Ornament
- Layered Clothespin Snowflake Ornament
- Wooden Slice Rae Dunn Inspired Ornament
Hopefully, you will all have fun creating the salt dough star ornaments. If so, please leave a star ★★★★★ rating and a comment below! And follow along on Pinterest, Facebook, or Twitter for more fun crafts!

Salt Dough Star Ornaments
Supplies
- 2 cups all purpose flour
- ½ cup salt regular table salt works best
- ¾ cup warm water
Equipment
- Rolling pin
- 2.5 inch star cookie cutter
- Straw
- White spray paint
- Twine
Instructions
- Preheat the oven to 250 degrees.
- Mix the flour and salt in a medium bowl.
- Slowly stir in the water, then knead with your hands once it gets too tough to stir.
- Lay out a sheet of parchment paper, then put half the dough on it. Place another sheet of parchment paper on top. Roll the dough out until it is an even layer, about ⅛ of an inch thick.
- Cut out the star shapes, then remove the excess dough.
- Poke a straw through the dough, towards one of the star points, to later be used to hang the ornament.
- Place the parchment sheet on a large baking sheet, and bake in the oven for about 90 minutes. Check on the baking dough after 60 minutes though, as cooking times vary, especially depending on the thickness of your dough. You want the dough to be firm, and hard; then it is done.
- Once the dough is cooked through, remove from the oven and allow to cool completely.
- Put the star ornaments on cardboard and take them outside to spray with paint. Allow the paint to dry, then flip over and spray the other side. Add an additional coat of paint to each side, if needed.
- Once ornaments are completely dry, cut 8 inch lengths of twine, and push one end through the hole on each ornament, and tie at the top.