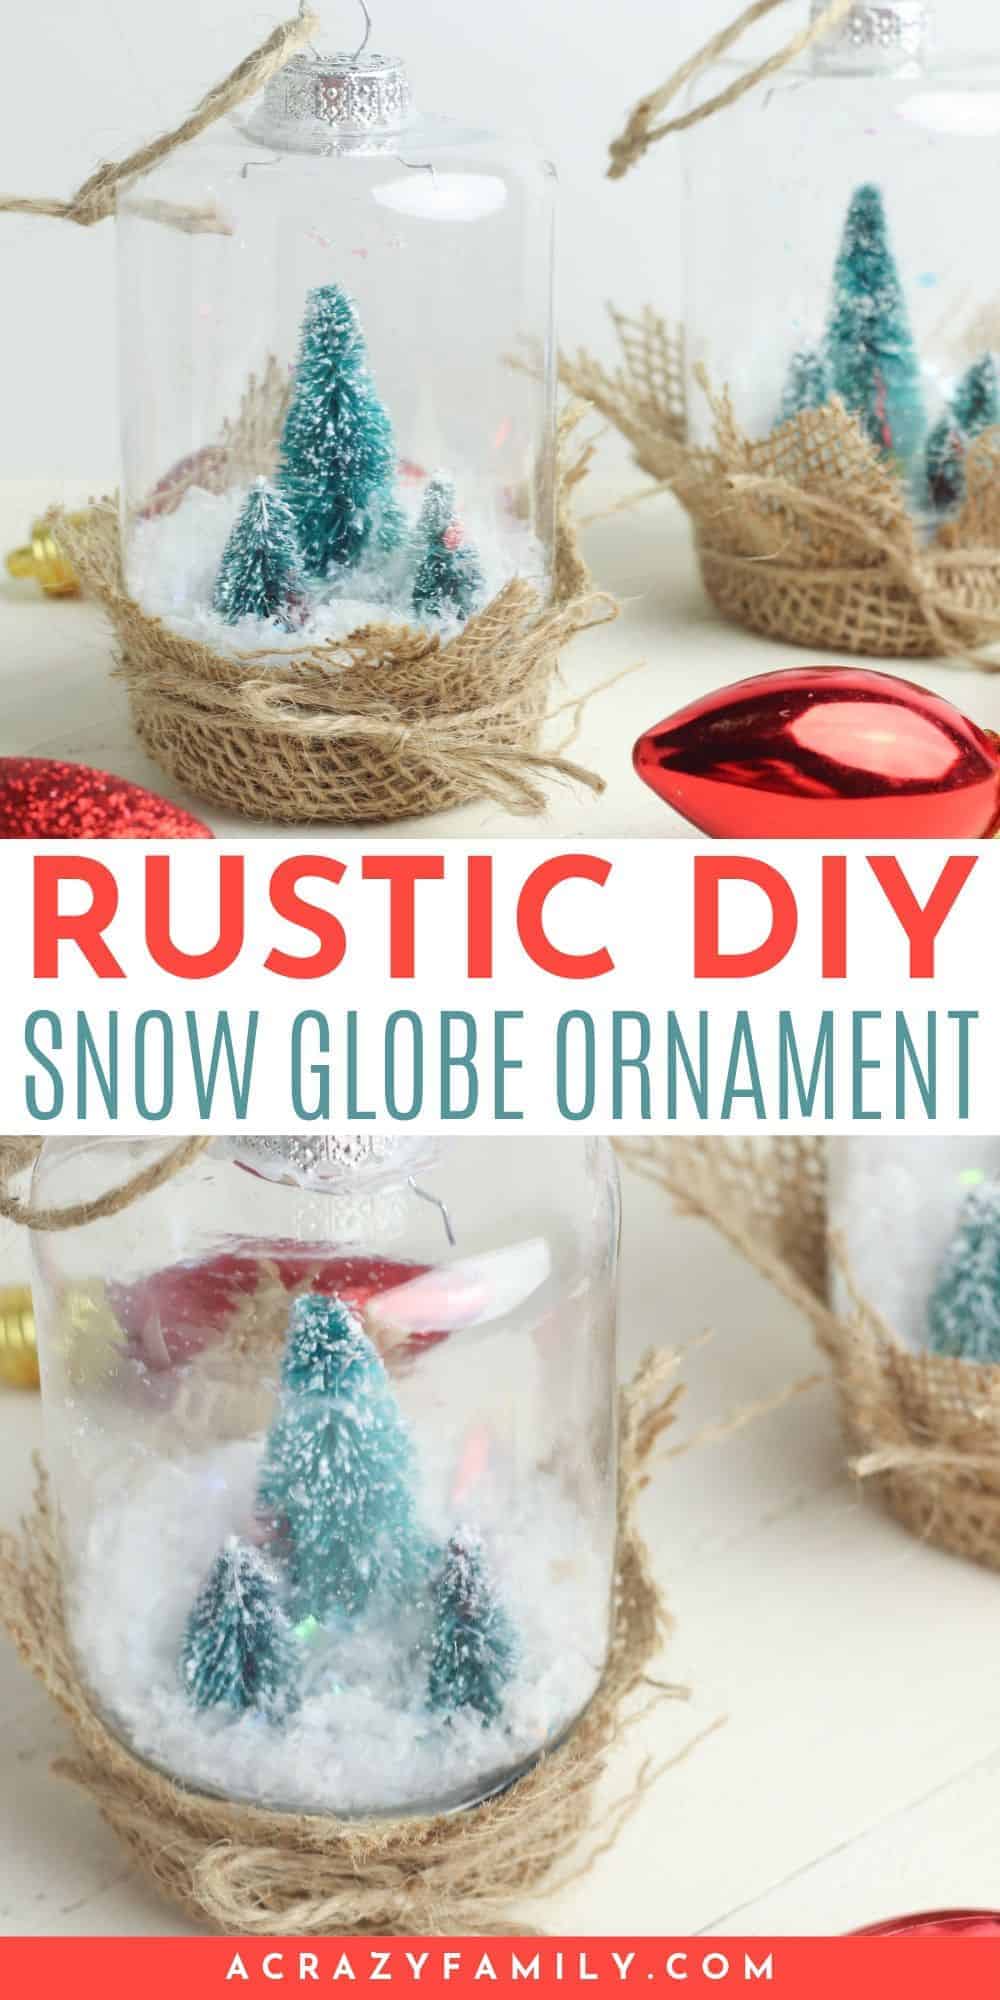

This simple DIY Christmas ornament is a water-free snow globe perfect for a farmhouse Christmas tree.

Water-Free Snow Globe Ornament
Snow globes are a popular way to decorate for the holidays. They look amazing hanging on your Christmas tree, too.
With this simple craft, you can quickly create your own water-free snow globe ornaments to decorate your tree. And since these farmhouse-style snow globe ornaments don’t have liquid inside, you can hang them from year to year without worrying about messy leaks!
How to Make Snow Globe Ornaments
Typically, snow globes are made with a liquid inside to help the snow look like it’s floating inside the globe. However, creating a snow globe ornament using liquid can be difficult and messy.
I found these cute blank snow globe ornaments at Dollar Tree and knew I had to turn them into farmhouse-style snow globes. But since the tops on these cute ornaments aren’t watertight, I couldn’t make them into traditional snow globes.
Luckily, this easy, water-free snow globe craft doesn’t need liquid to look amazing. And you can still get a snowy effect when you shake it!
Plus, they’re so easy to make that your kids can even get in on the fun.
Supplies
Start by gathering all your supplies. To make these DIY farmhouse ornaments, you’ll need:
Set the Scene in Your Snow Globe Ornament
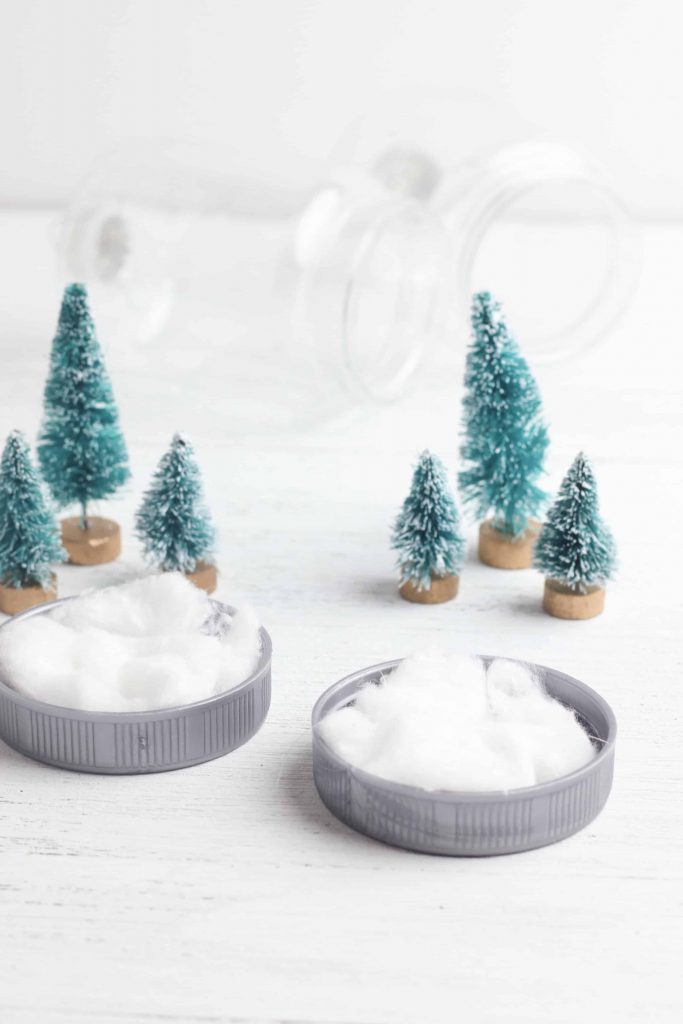
The first step in making this rustic snow globe ornament is to set the winter scene inside the ornament. To make my winter forest scene, I used a cotton ball for the snow and some mini winter trees. To put it all together, I used my handy hot glue gun.
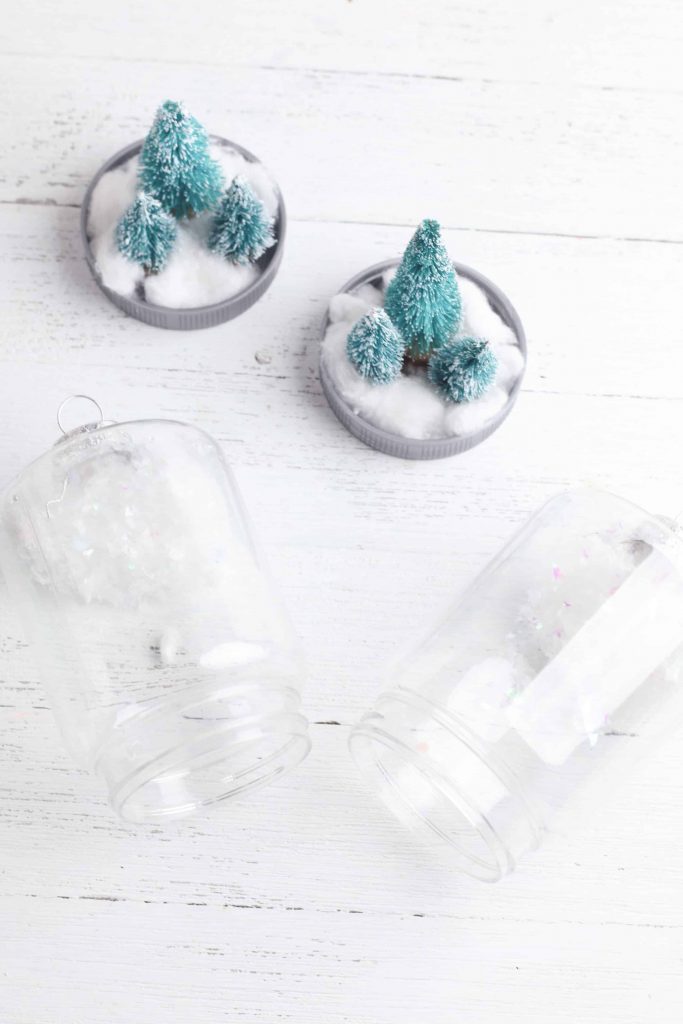
First, remove the bottom from your snow globe ornament and set the top aside. The bottom will be the base for the winter scene inside. Start by gluing your cotton ball on the bottom of the lid to resemble a blanket of snow on the ground.
Pull the cotton ball apart a little bit to spread it out to make it look like snow. Add a few drops of glue to the inside of the lid and spread the cotton ball all over the area. After gluing the cotton ball into place, fluff it with your fingers.
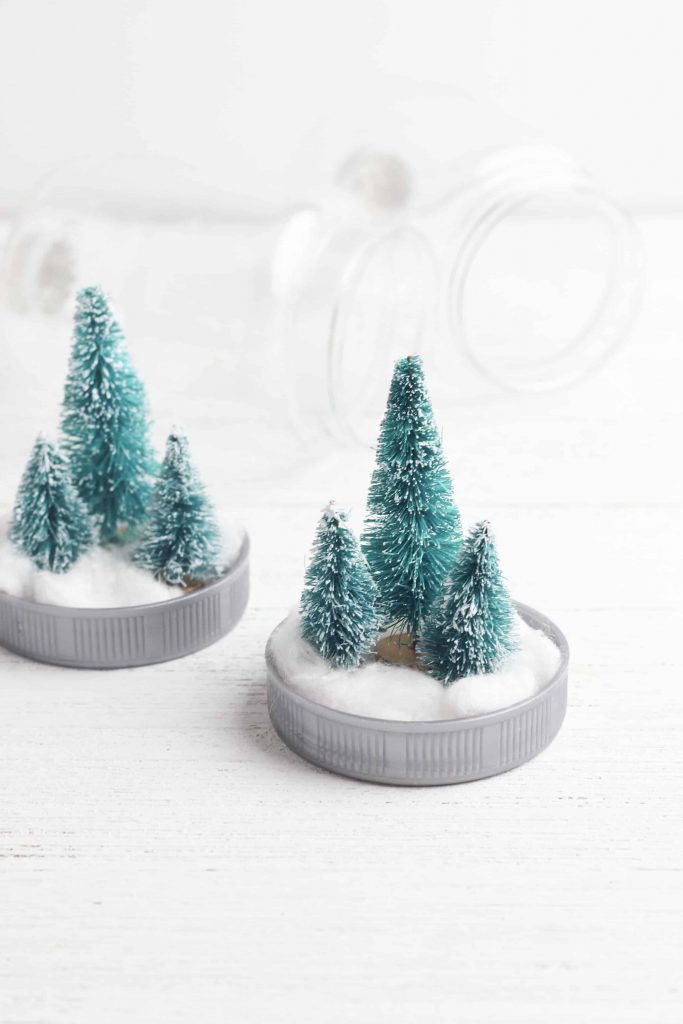
After waiting for the glue to dry on your cotton ball snow, it’s time to add the trees.
To ensure your trees stand up straight, I recommend spreading the cotton ball out until you see a clear spot on the lid. Place a drop of glue on the bottom of your tree and glue it to the lid. Keep adding trees like this until your winter forest scene is finished.
Make sure your lid is completely covered with cotton ball snow by fluffing the snow one more time and covering the bare spots before moving on to the next step.
Add the Snow to Your Snow Globe Ornament
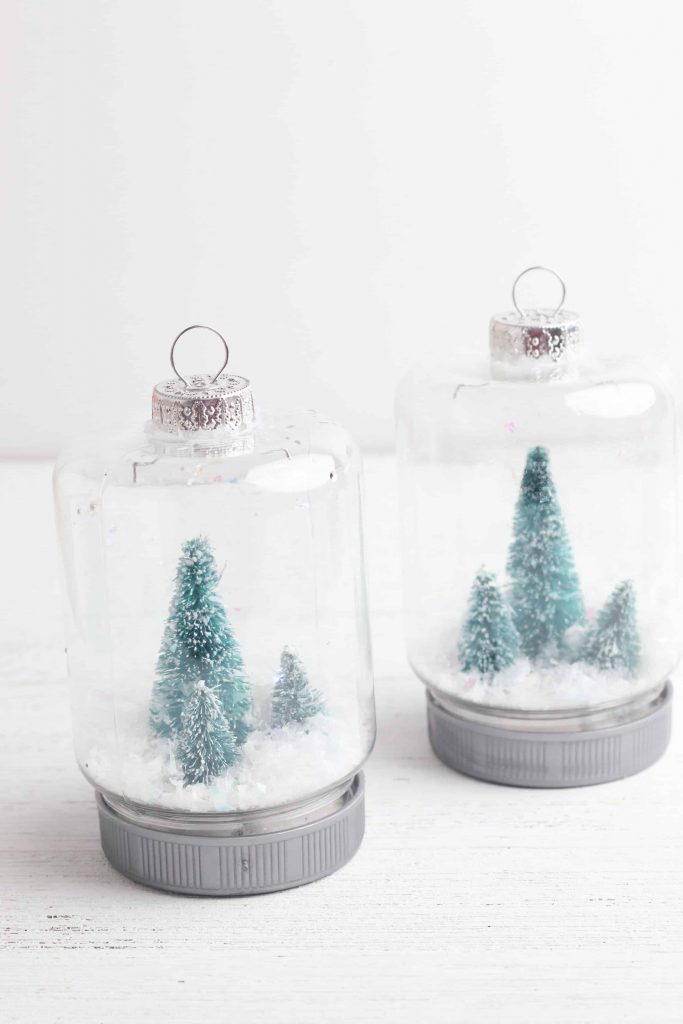
When you’re happy with the look of your forest scene inside your snow globe, it’s time to add the snow! Give the glue time to dry on your winter scene by setting it aside for a few minutes.
Take a second to make sure the top hanger on your ornament is secure, then spoon a small amount of glittery snow inside the globe. My snow globe ornaments have around three scoops of snow inside, but add more or less to suit your needs.
Double-check to make sure the glue is dry on your winter forest scene inside your snow globe lid. Then, carefully screw the lid into place on your snow globe.
Give the globe a quick shake to stir the snow.
Decorate Your Snow Globe
While you could finish your snow globe craft here if you want a more rustic look to your ornament, keep reading!
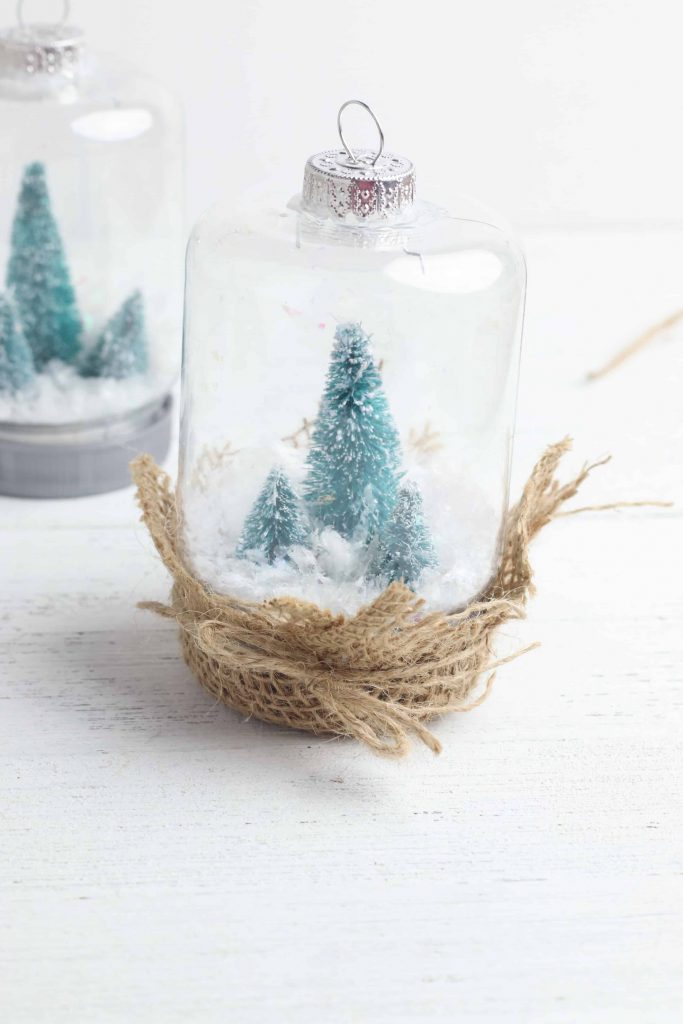
Add a bit of burlap and twine to your snow globe ornament to add a rustic touch. Start by gluing burlap to the bottom of the snow globe to cover the plastic lid and add a rustic touch.
Cut two small squares of burlap to cover the bottom lid of each ornament. Stagger the burlap pieces, then attach them to the bottom of the ornament with glue. Add some hot glue to the bottom of the ornament and secure the burlap in place there, then add a small amount of glue to the sides and secure the burlap there, too.
Finally, add a bow of twine around the burlap pieces to finish the decoration and secure the burlap in place.
Finish decorating your snow globe ornaments by cutting off the silver string from the top and tying a small loop of jute twine to the top to give it a farmhouse look.
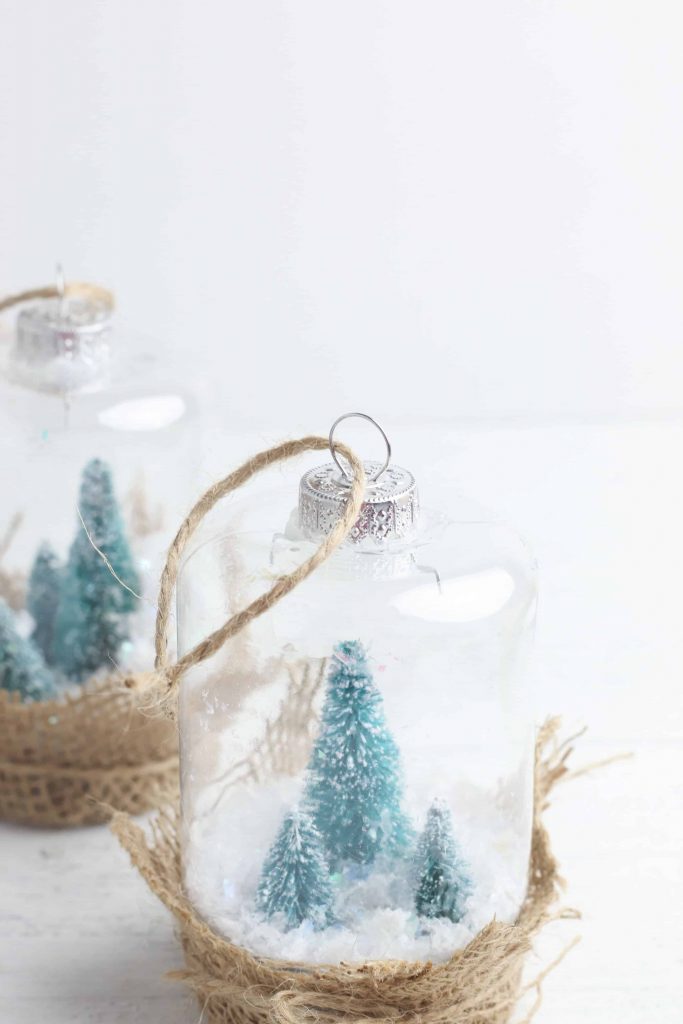
I love how glittery snow rests around the base of the trees inside this cute snow globe ornament. But when you want to see snowfall around your forest trees, simply shake the ornament!
A DIY Christmas Craft That Kids Can Make.
This simple DIY Christmas ornament is so easy to do that your kids could definitely put it together! However, since this craft uses hot glue, I suggest you provide supervision while your kids make the craft.
More Fun Christmas Crafts
I hope you enjoy your Rustic DIY Snow Globe Ornament. If so, please leave a star ★★★★★ rating and a comment below! Follow along on Pinterest, Facebook, or Twitter for more fun crafts!

Rustic Snow Globe Ornaments
Supplies
- Empty snow globe ornament from Dollar Tree
- Cotton balls
- Mini trees
- Glitter snowflakes
- Burlap
- Jute twine
Equipment
- Hot glue gun
Instructions
- Remove the lid from the snow globe ornament.
- Glue cotton ball to the inside bottom of the lid. Glue three trees around the snow.
- Pour a small amount of glitter snowflakes inside the top of the snow globe ornament.
- When the glue is dry, carefully place the lid on the snow globe ornament.
- Cut two small squares from the burlap. Glue the burlap squares to the bottom of the ornament. Tie a piece of jute twine around the burlap to secure it in place and finish with a bow.
- Tie another piece of twine on the top of the ornament to hang it from the Christmas tree.