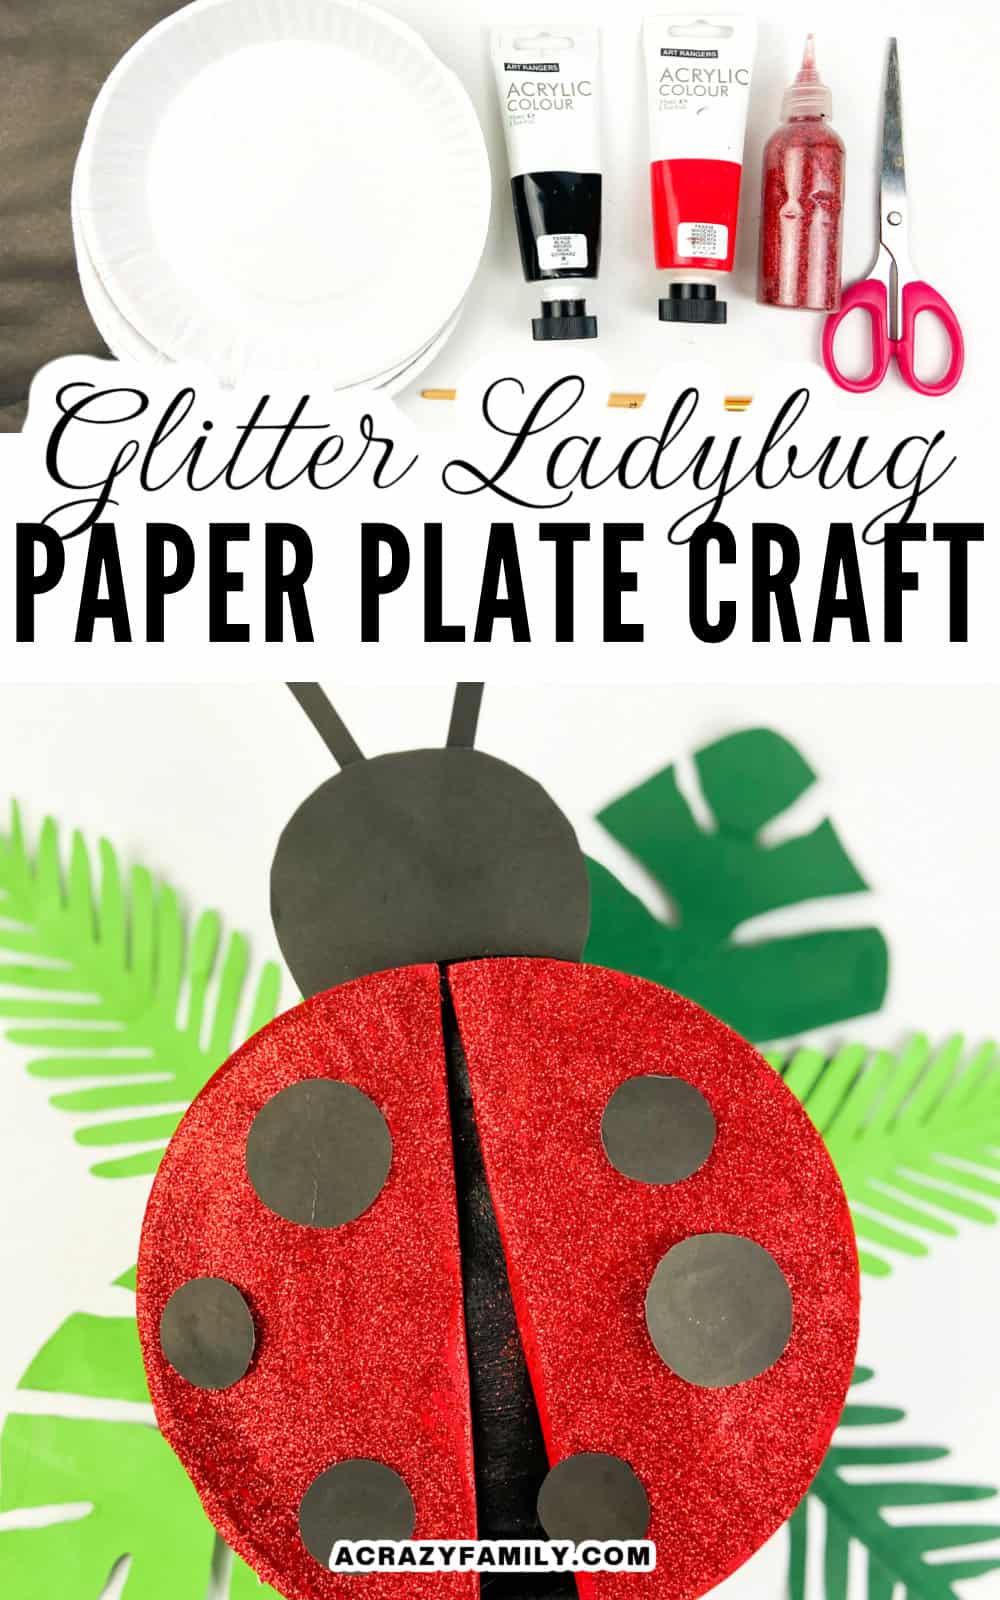
Making this ladybug kid’s craft is easy and a lot of fun. You’ll need some paper plates, paint, black construction paper, scissors, and glue. Cut the circles out of the black construction paper for the spots on the ladybug’s back. Paint the paper plates and let them dry. And glue on the black spots and antennae. Your kids will love this cute ladybug craft!
Easy Ladybug Craft
Looking for an easy-to-make craft project that your kids will love? Then this adorable ladybug craft is the perfect activity!
Perfect for kids of all ages, this cute craft is a great way to have your little ones using their creativity to create sparkly ladybugs in no time.
With just a few simple materials like paper plates, glitter, glue, and construction paper, you can turn ordinary items into amazing works of art. And best of all – you get to enjoy some quality family time together while making it!
Why We Love This Craft
- The perfect little project for a rainy day.
- So much fun and easy that kids of all ages will love to make them.
Supplies

- Paper plates
- Paint (red and black)
- Paintbrush
- Red glitter
- Glue stick
- Black construction paper
How to make a fun paper plate ladybug
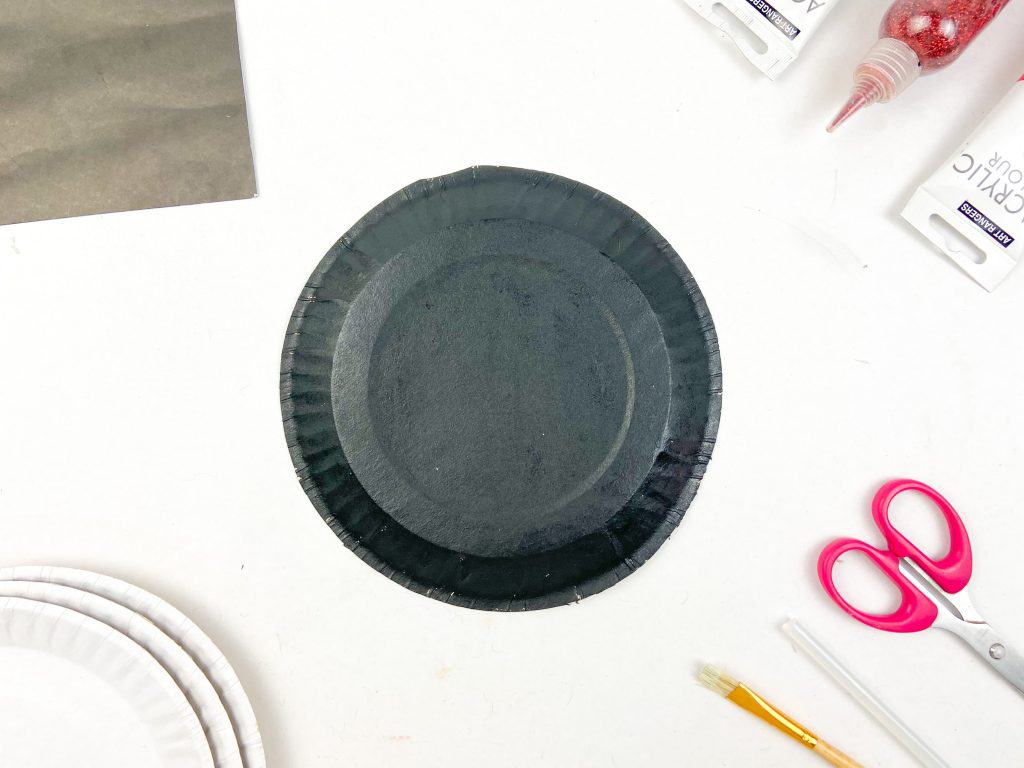
1. Paint one paper plate with black paint. Paint two paper plates with red paint. Let them dry completely before proceeding to the next step.
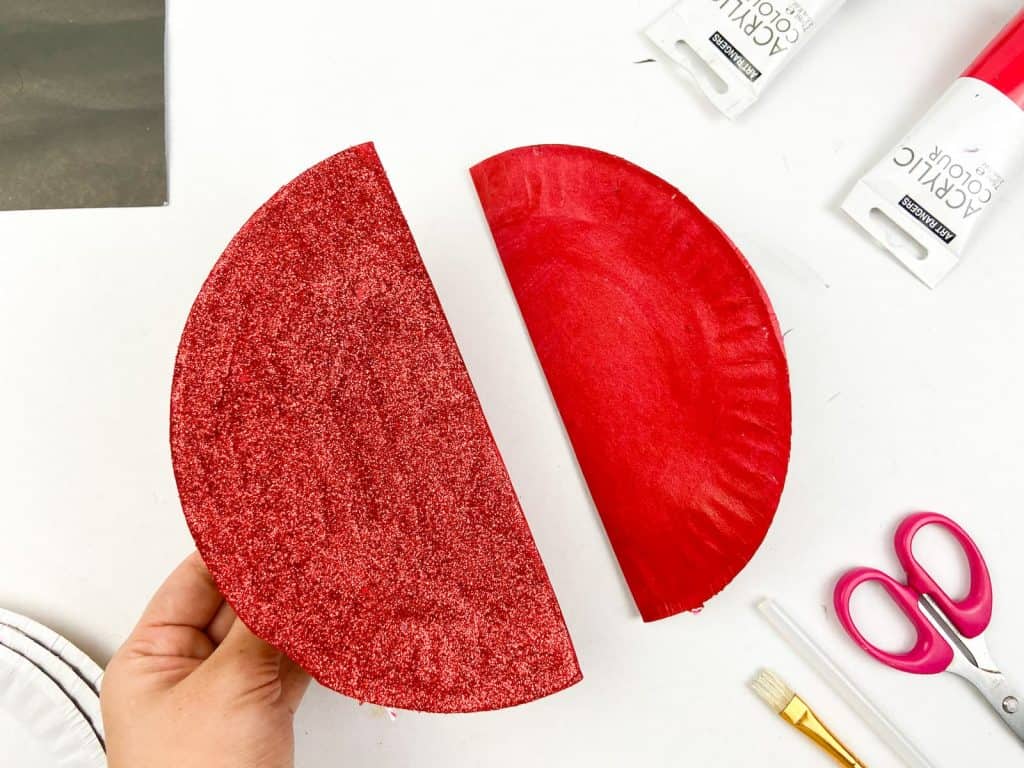
2. Fold the two paper plates that are painted red in half. Apply glitter at the top. Make sure that the half is covered with glitter. Let it also dry before doing the next step.
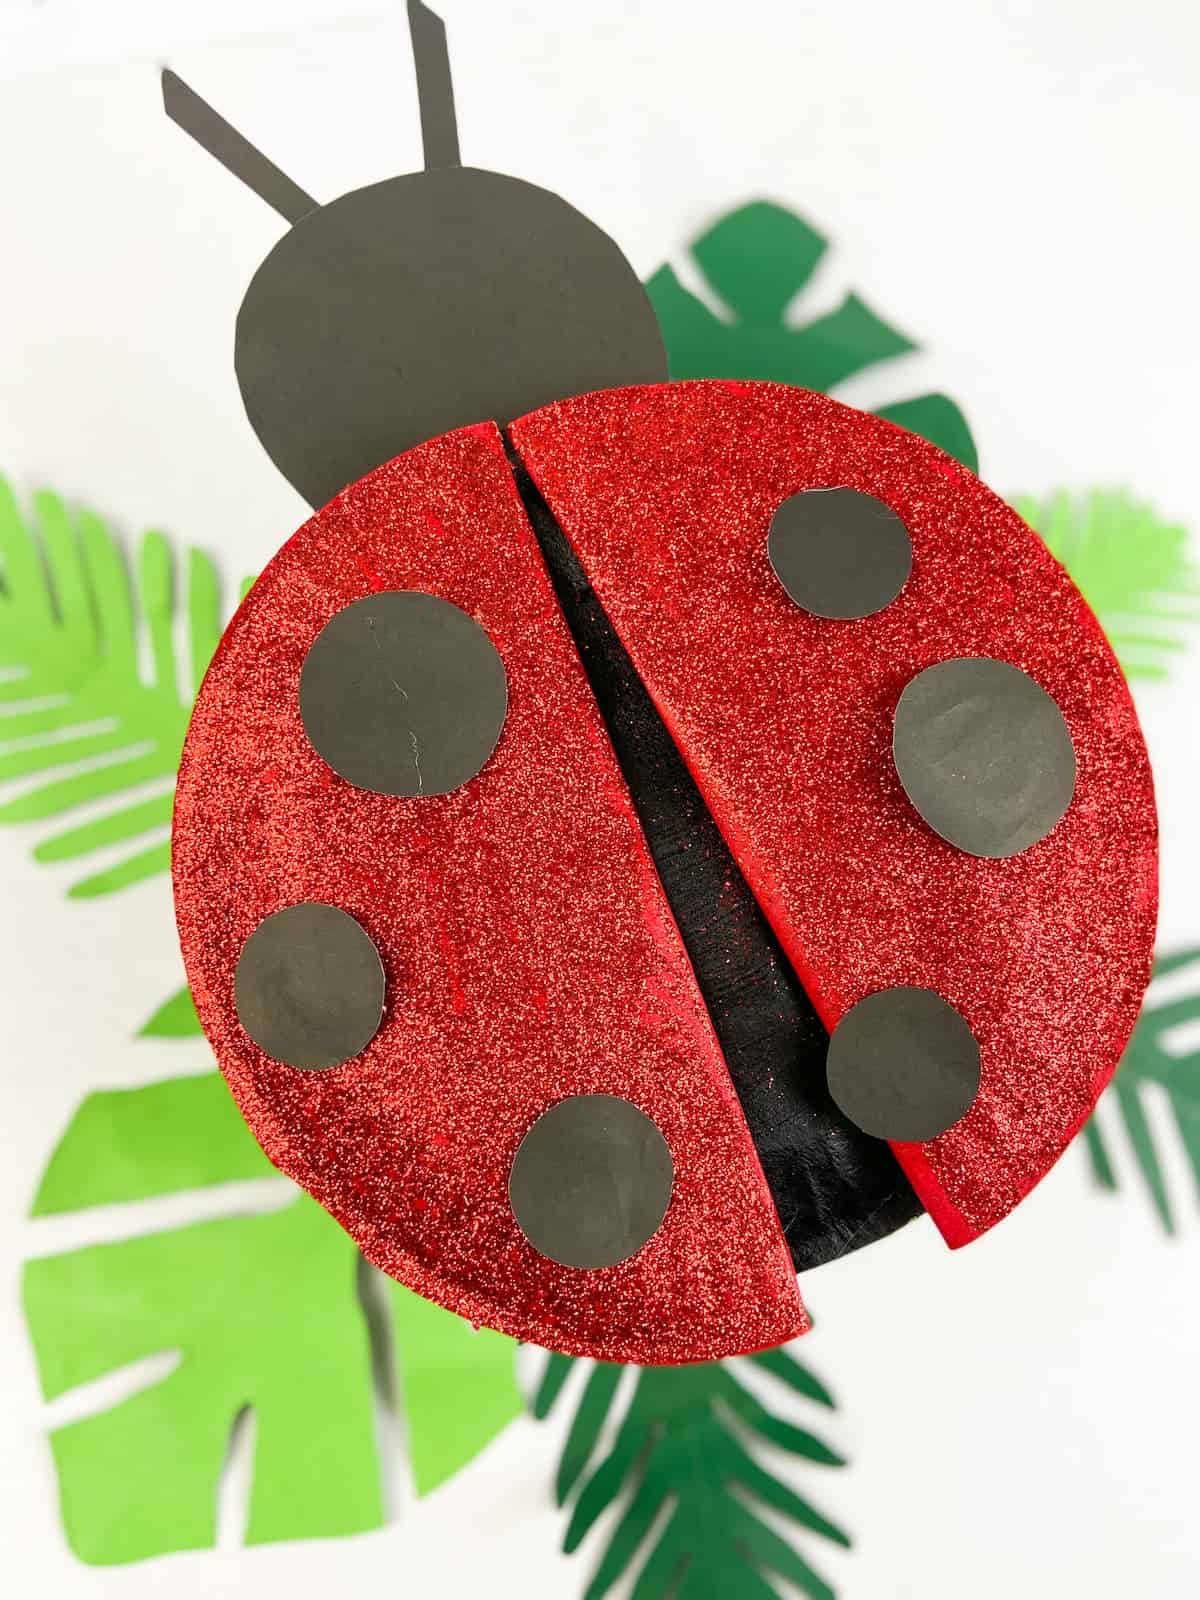
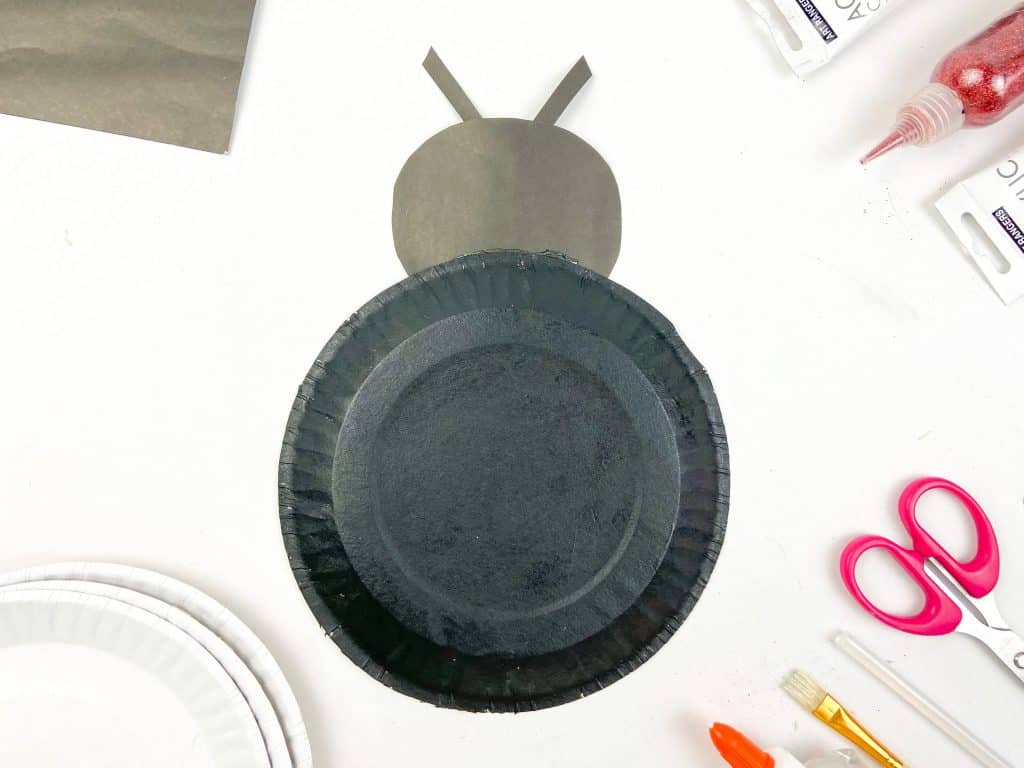
3. Make the ladybug’s head from black construction paper. Cut a petal shape, then two strips of black construction paper to make the antenna. Then place it on the back of the black paper plate.
4. Cut small circles from the black construction paper and attach them to the red paper plates.
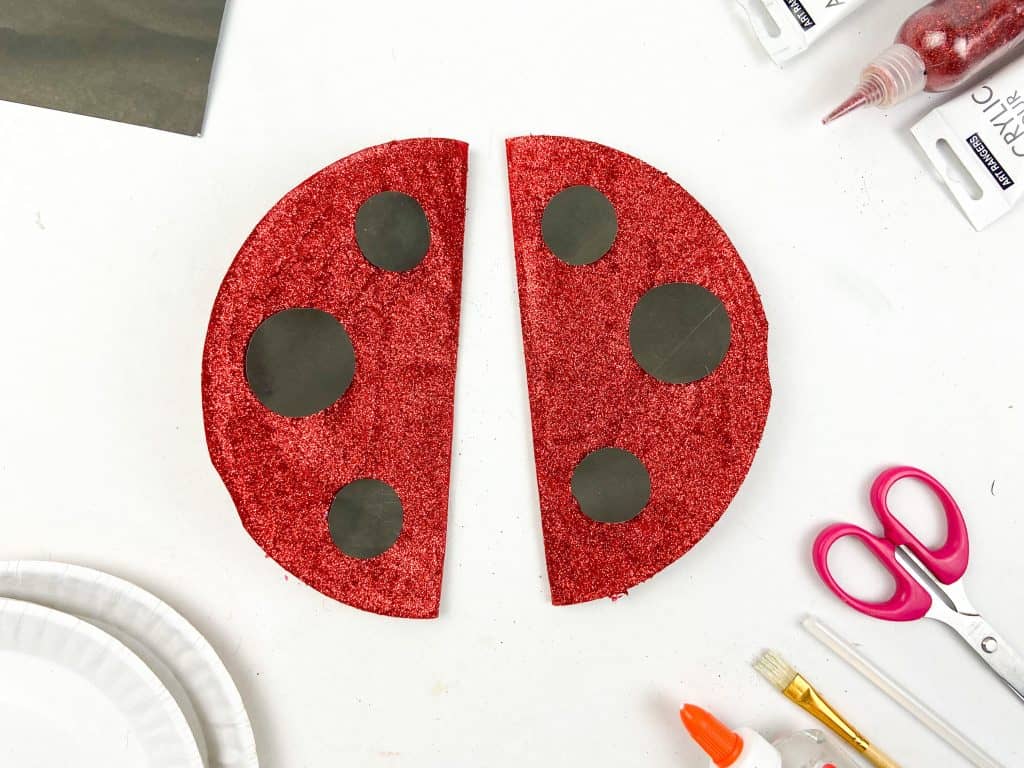
5. Attach the red paper plates to the black paper plate. Attach with a v-shape as shown in the picture.
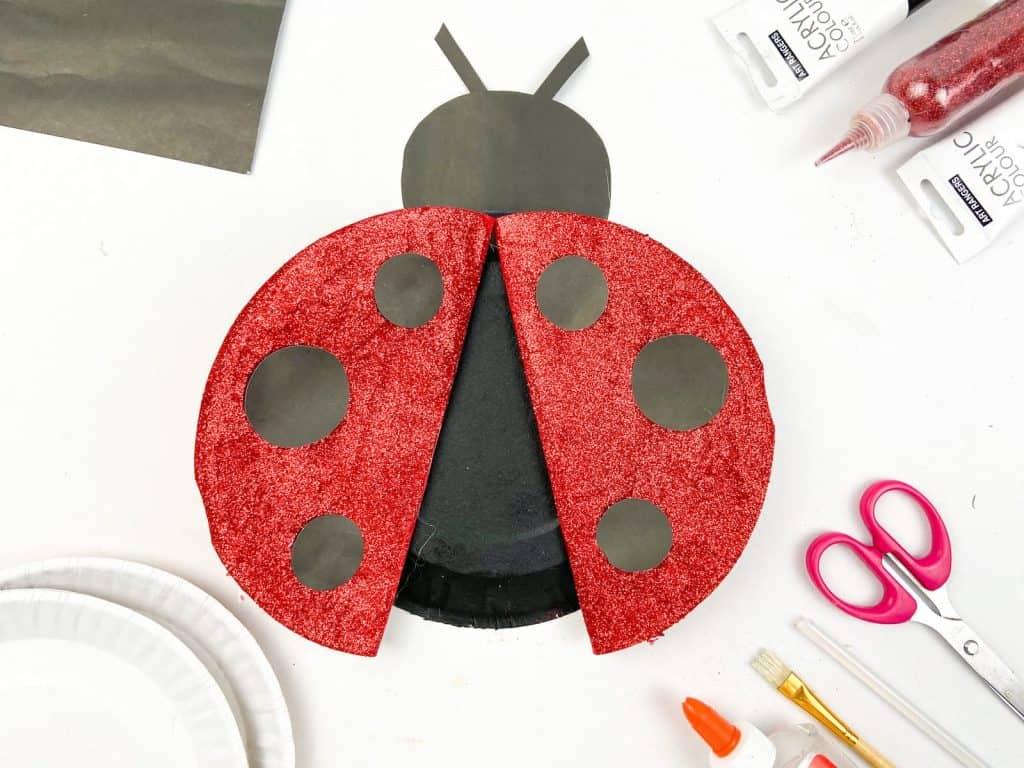
Now you have your glittery ladybug!

TIPS and Tricks
- Be careful when using scissors and paint. Supervising younger kids as necessary.
- Choose the proper materials.
- Let your creativity flow and have fun!
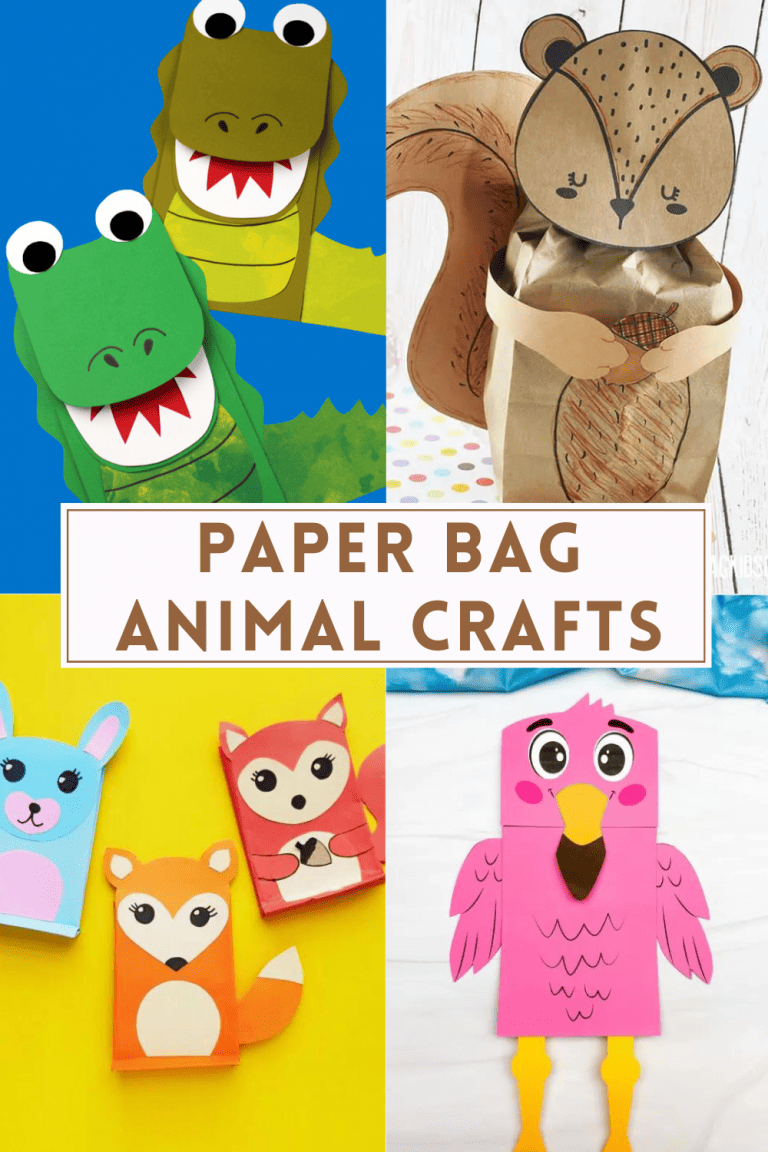
More Kids Crafts
I hope you enjoy your Easy Paper Plate Glitter Ladybug Kids Craft. If so, please leave a star ★★★★★ rating and a comment below! Follow along on Pinterest, Facebook, or Twitter for more fun crafts!
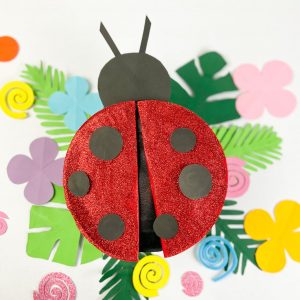
Paper Plate Glitter Ladybug
Supplies
- 3 Paper plates
- Paint red and black
- Red glitter
- Black construction paper
Equipment
- Glue stick
Instructions
- Paint one paper plate with black paint. Paint two paper plates with red paint. Let it dry completely before proceeding to the next step.
- Fold the two paper plates that are painted red in half. Apply glitter at the top. Make sure that the half is covered with glitter. Let it also dry before doing the next step.
- Make the ladybug’s head from black construction paper. Cut a petal shape, then two strips of black construction paper to make the antenna. Then place it on the back of the black paper plate.
- Cut small circles from the black construction paper and attach them to the red paper plates.
- Attach the red paper plates to the black paper plate. Attaching them in a v-shape.