Mushroom Craft For Your Fairy Garden
This post may contain affiliate links. Please read our disclosure policy.
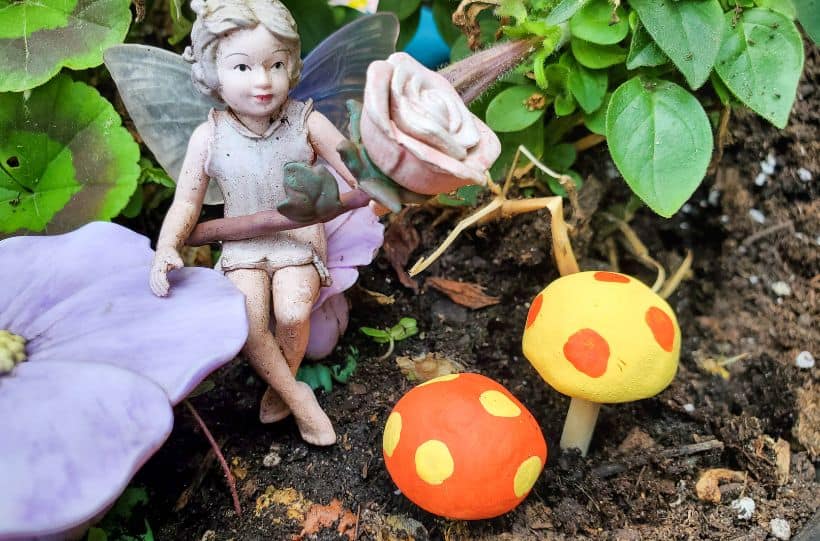
Fairy gardens are such a fun option for the summer. You can make them indoors or outdoors, and decorate them with all sorts of fun props. You can even make some of our own fairy garden decorations, like these fairy garden mushrooms!
A fairy garden is an ideal way to capture the imagination of your little ones, and as adults, we can also have fun creating the spark and magic.
If you love fairy gardens, then one of the passions you might have would be what to put in your own. There is no right or wrong answer to this, and it really is all down to how far your imagination will take you. But one thing that you might want to consider is Fairy Garden Mushrooms.
The truth is, you can purchase a fair few accessories for your fairy garden, but where is the fun in that? You can simply create things like the Fairy Garden Mushrooms and add your own unique touch to your fairy garden.
So if you are interested in making some Fairy Garden Mushrooms then here is everything that you need to know.
The supplies you need to create the Fairy Garden Mushrooms
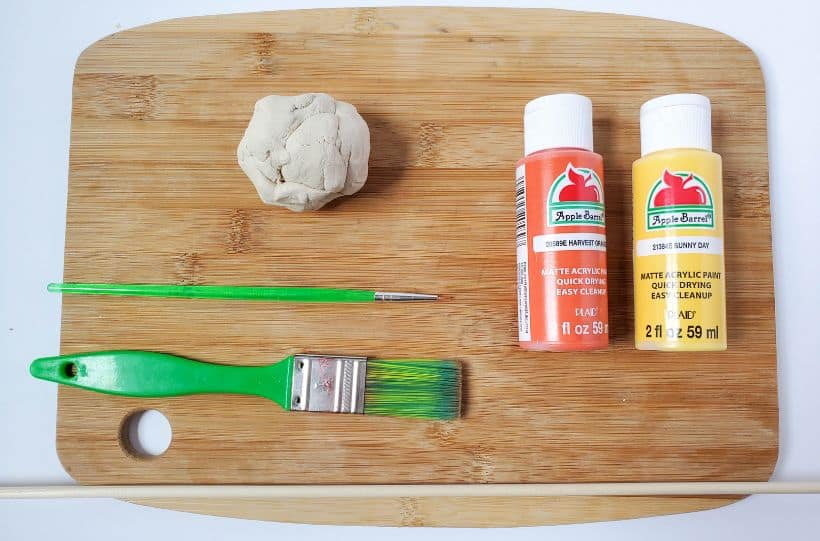
- Air-dry clay
- Thin wooden dowel
- Orange and yellow paint
- Small paint brush
- Thin tip paint brush
- Sharp knife
- Paper straws (optional)
How to make the Fairy Garden Mushrooms
Now that you have everything you need, it is time for the fun part. Let’s make your Fairy Garden Mushrooms.
Gather all of the supplies that you need and find a place where you have some space to get creative. Cut your dowel into 2 – 1 ½ inch pieces.
Next up, grab a small piece of air-dry clay and roll it into a ball, then place it on your knuckle to shape it into a mushroom cap.
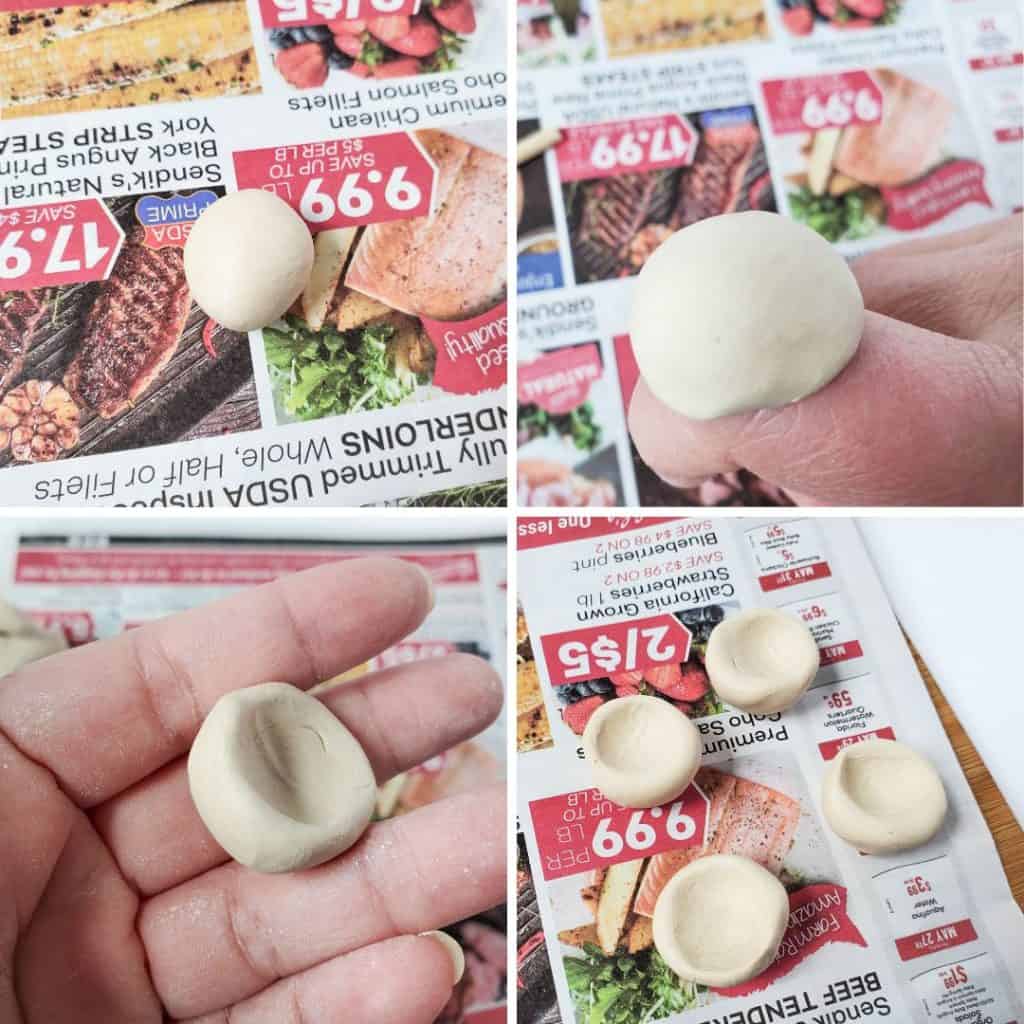
Gently push a piece of the dowel through the bottom of the mushroom cap, about halfway through it. You will then need to allow it to dry overnight.
Paint the bottom of the mushrooms a solid color using a small paintbrush.
Paint the top of the mushrooms a solid color using a small paintbrush. (I used paper straws inside of a small glass to help with this – put the dowel part of the mushroom into the straw to hold it while you paint!)
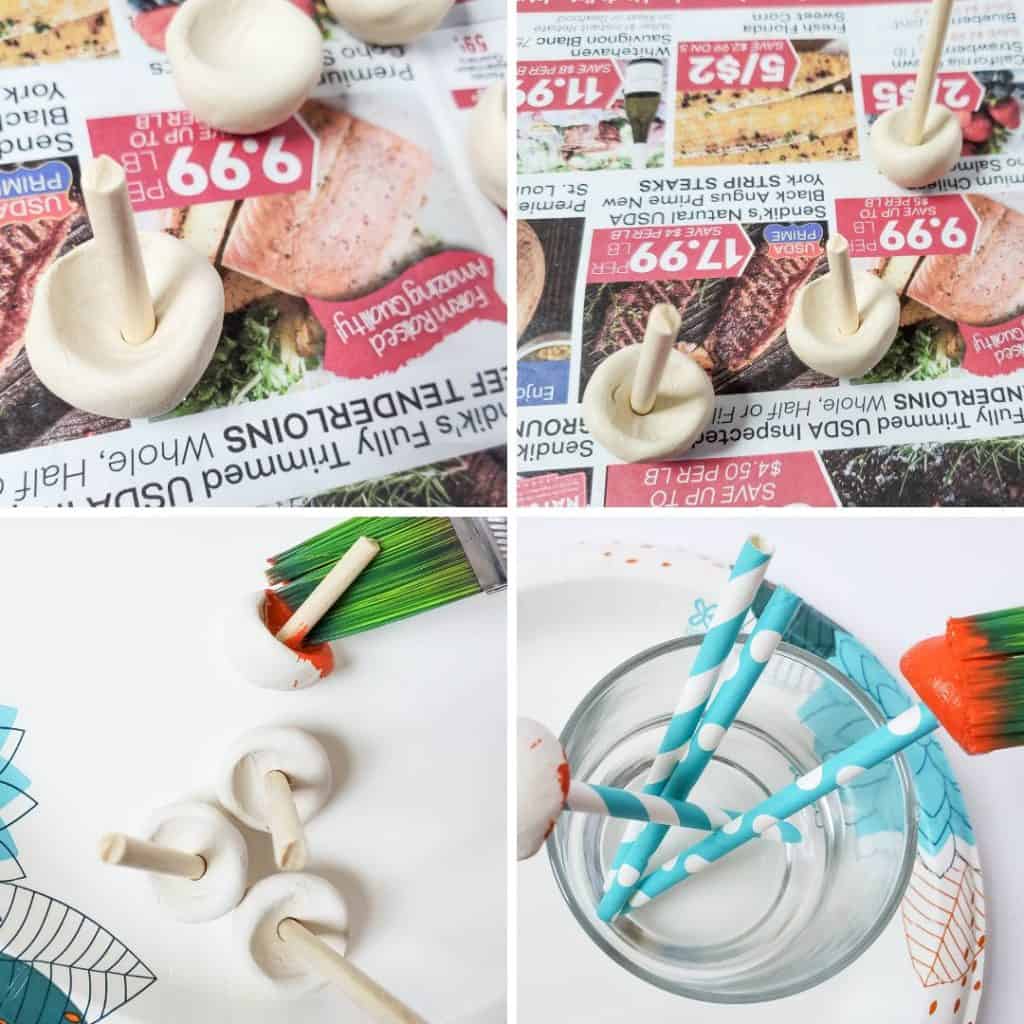
You will need to let the paint dry completely before moving on to the final details. Once the paint dries, use the thin-tipped paintbrush to paint circles on the mushroom caps.
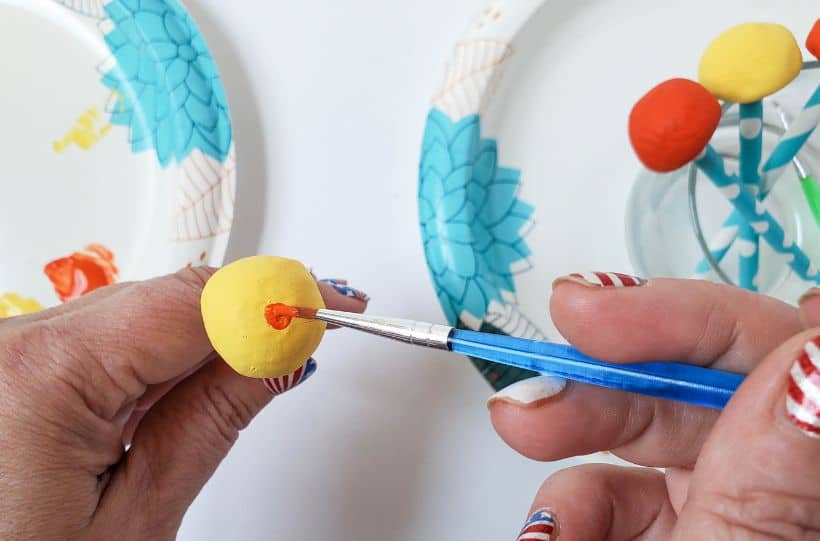
Once they dry your Fairy Garden Mushrooms are ready. You can then place them into your fairy garden.
Notes and tips
- Make sure you have space to work and also a place where the mushrooms can dry overnight and avoid getting squashed or damaged in some way. You need to give the Fairy Garden Mushrooms time to dry properly, so a place out of reach of children would be advisable.
- If children are helping make sure they are supervised when using the clay and when painting.
- It can be fiddly because they are small, so take your time with the painting to ensure that you get the desired look.
- Clay is fragile, so make sure you avoid placing the Fairy Garden Mushrooms in an area where they could be stomped on or damaged.
Variations
- You can make the Fairy Garden Mushrooms larger in size if you wanted to. Use more clay and instead of your knuckle, you could shape them on something else that has a round edge. For example, you could use a spoon or a ladle.
- Go crazy with the colors. Fairy Garden Mushrooms can be whatever color you want them to be. I have suggested using colid colors on the base and top, but you could create patterns if you wanted to. You don’t need to stick with red and white either. Let the imagination run wild.
- Once you have grown used to using air-dry clay, you could make other things that will work well in your fairy garden. This is a great way to get creative.
Frequently Asked Questions
What is a fairy garden?
A fairy garden is a miniature display that you can create either indoors or outside. It is a great way to capture the magic and imagination of children and adults while creating something that is also beautiful and pretty to look at.
What can you put in a fairy garden?
As the fairy garden is created to look pretty and beautiful you can put anything you want in it. The idea is to keep things small and miniature, so as to encapsulate the fairy garden and environment, but it really is the owner’s choice here. You can do what you want.
How easy is it to use air-dry clay?
Air-dry clay is very easy to use. You can spend the time molding your creation and then it will dry over time, rather than needing to use a kiln or any other heating equipment.
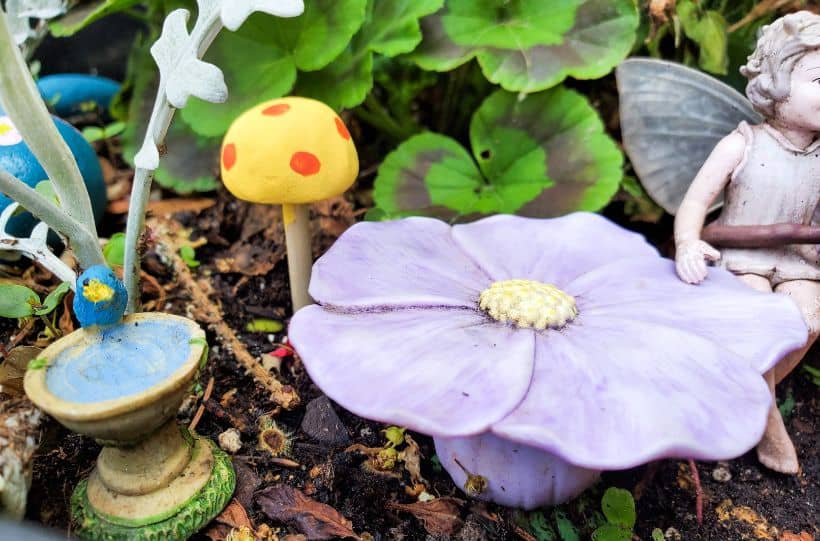
Hopefully, this will have inspired you to make the Fairy Garden Mushrooms and create a fairy garden of your own. Enjoy!
For more fairy garden fun, check out:
Fairy Garden Mushrooms
Supplies
- Air dry clay
- Thin wooden dowel
- Orange and yellow paint
- Small paint brush
- Thin tip paint brush
- Sharp knife
- paper straws optional
Instructions
- Cut your dowel into 2 – 1 ½ inch pieces.
- Roll a small piece of clay into a ball, then place it on your knuckle to shape it into a mushroom cap.
- Gently push a piece of the down through the bottom of the mushroom cap, about halfway through it. Allow to dry overnight.
- Paint the bottom of the mushrooms a solid color using the small paint brush.
- Paint the top of the mushrooms a solid color using the small paint brush. (I used paper straws inside of a small glass to help with this – put the dowl part of the mushroom into the straw to hold it while you paint!)
- Once the paint dries, use the thin tipped paint brush to paint circles on the mushroom caps.
- Once they dry, place them into your fairy garden.

